
Archive for the ‘Lunch/Dinner’ Category
I am one of those people who has a slight addiction to Pinterest. It’s not a “hi, my name is Carrie and it’s been five minutes since my last Pin” kind of addiction, but I can get caught up designing my dream kitchen and reading the work-outs that take less time to actually do then it takes to read and Pin. Of course, I love reading recipes. Lately, I have been really interested in the recipes for ingredients that I would typically buy when making a dish such as cheese, breads, and this one for homemade flour tortillas.
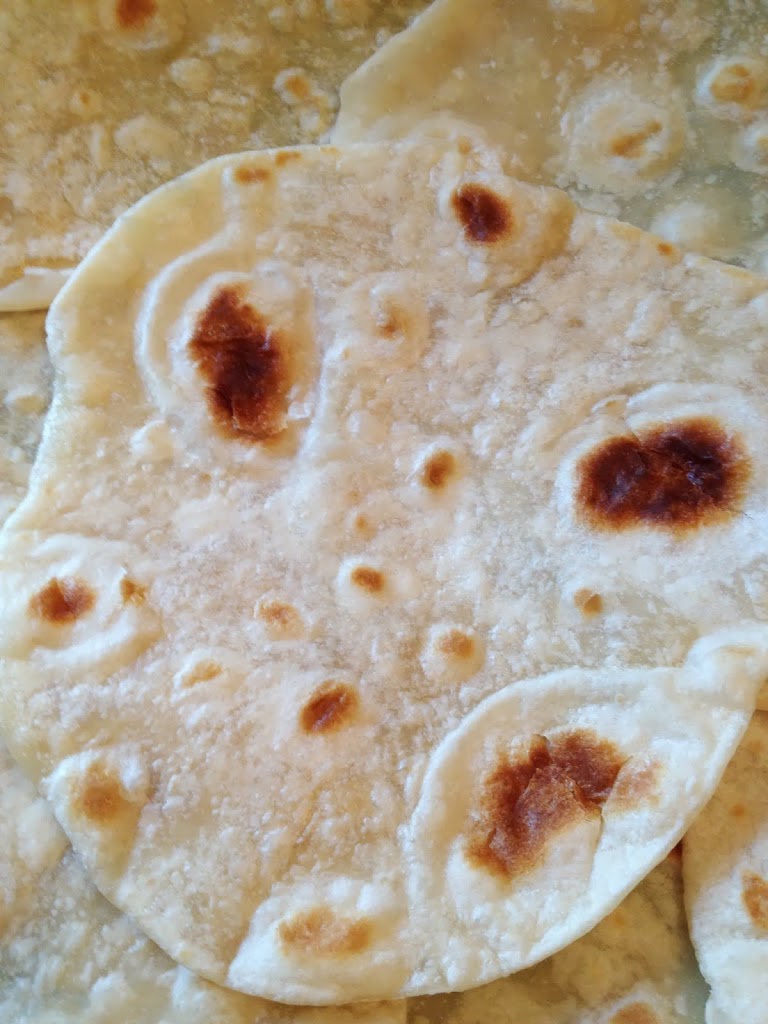
I used to have a favorite Mexican restaurant that made their flour tortillas fresh on a griddle just outside the kitchen so you could watch them being prepared. They were brought to the table warm and soft…so yummy! But, I honestly had never thought to make my own until seeing all of the Pinterest posts. How simple it is! Only four ingredients, if you count the water, and less than 30 minutes. This is a fun recipe to cook with the kids too. They can help knead and roll the dough.
My adaptation to the recipe is that I used Coconut Oil and a little butter instead of shortening (so technically, five ingredients). There has been a lot of information available about the health benefits of Coconut Oil. I’m not a doctor, so check out the research for yourself. Click here for a great resource about Coconut Oil. I have been using it in place of my facial moisturizer, body lotion, to rinse my mouth and on the ends of my hair with great results. I have also been using Coconut Oil and Coconut Milk in the kitchen. Coconut Oil is a saturated fat, which contrary to the push for chemically altered poly unsaturated fats, our bodies need for things like brain cell health and fuel.
Flour Tortillas
2 3/4 C All-purpose flour
3 T Coconut Oil & 2 T Cold Butter (or 5 T Shortening)
3/4 t salt (I used Kosher salt)
3/4 C very warm Water
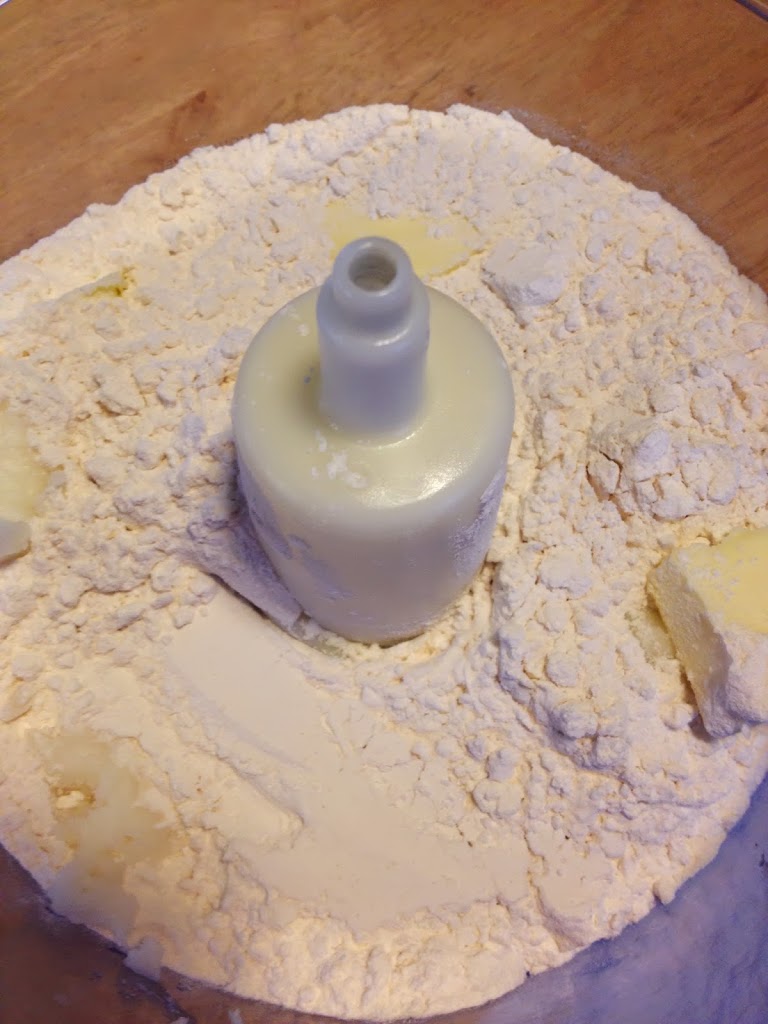
Put the flour, salt and oil/butter in a processor and pulse until combined. Slowly add the water to the mixture on a low setting until the dough forms a ball in the processor.
Put on a lightly floured surface and knead for 2 minutes.
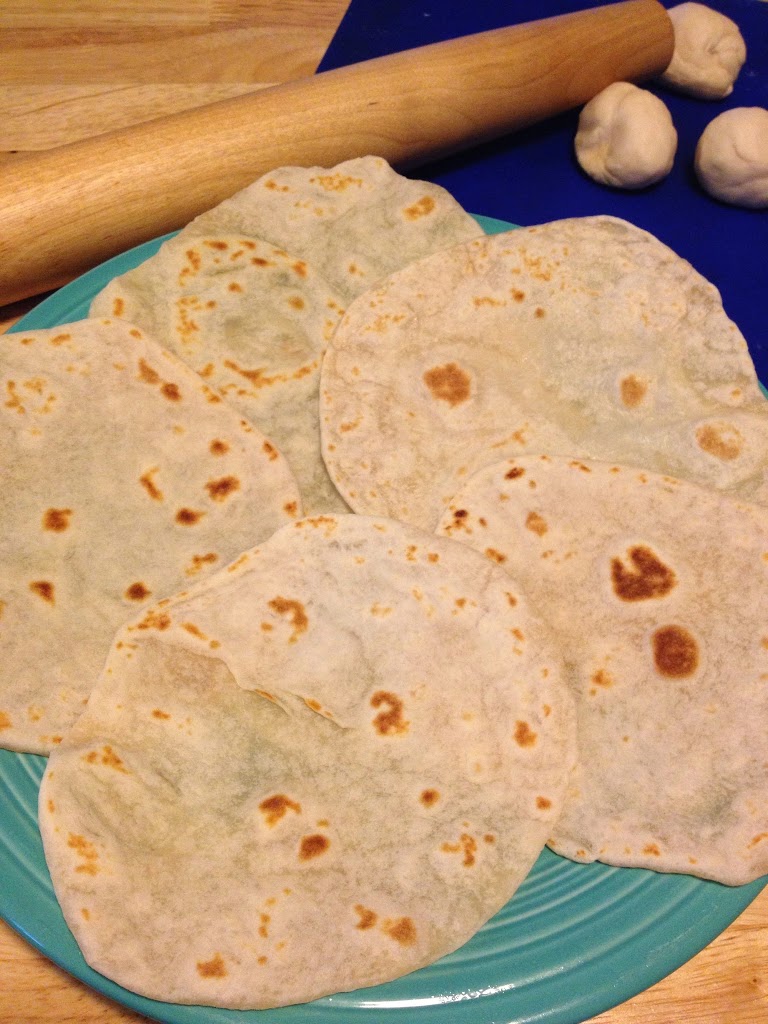
Divide the dough into 10-14 pieces depending upon the size of the tortillas you desire. Roll the pieces into balls and let sit while you preheat the skillet. Heat a non-stick skillet over medium heat.

Roll each ball very thin. Place one or two at a time in the skillet. When the dough begins to bubble, flip the tortilla over. It only takes about a minute for each side. Don’t over-cook or they will get tough.

Remove from the pan to a serving dish. Use for tacos, burritos, quesadillas or enchiladas. You can also make fresh chips by brushing lightly with olive oil, cutting into triangles with a pizza cutter, putting the pieces on a baking sheet, sprinkling with salt and baking at 350 degrees for about 5-8 minutes until the edges are a golden brown.
If you don’t use the tortillas right away, allow them to cool and store in the refrigerator in a resealable bag.
Once you have warm, soft fresh tortillas, you won’t mind the few extra minutes of prep time. What else can flour tortillas be used for?? Here is one idea: a scrumptious Roasted Garlic and Gorgonzola Quesadilla.
Super Simple Tortillas made with Coconut Oil
Author: Changing Seasonings
Recipe type: Main Dish
Cuisine: Mexican
Prep time:
Cook time:
Total time:
Serves: 10-14
Warm soft flour tortillas made with coconut oil.
Ingredients
- 2¾ C All-purpose flour
- 3 T Coconut Oil & 2 T Cold Butter (or 5 T Shortening)
- ¾ t salt (I used Kosher salt)
- ¾ C very warm Water
Instructions
- Put the flour, salt and oil/butter in a processor and pulse until combined. Slowly add the water to the mixture on a low setting until the dough forms a ball in the processor.
- Put on a lightly floured surface and knead for 2 minutes.
- Divide the dough into 10-14 pieces depending upon the size of the tortillas you desire. Roll the pieces into balls and let sit while you preheat the skillet. Heat a non-stick skillet over medium heat.
- Roll each ball very thin. Place one or two at a time in the skillet. When the dough begins to bubble, flip the tortilla over. It only takes about a minute for each side. Don't over-cook or they will get tough.

I am often looking for unique casual get-together foods. Dishes that are slight twists on the average fare that people might serve or bring to a party. These tasty little sammies are an adaptation of the “Sassy Ham and Cheese Sandwiches” shared by Caryn Ross on Food Network.com and in many varieties all over the web, so I can’t take total credit for them. However, baking them in a cast iron pan is one of my adaptations. Cooking in cast iron causes the buns slathered in oniony-cheesy goodness to crisp and really adds to the flavor. And of course, it wouldn’t be a recipe of mine if there weren’t some additions of great spices to jazz things up a bit. In this case, the addition of fresh grated nutmeg which I often pair with dishes that include Swiss cheese.
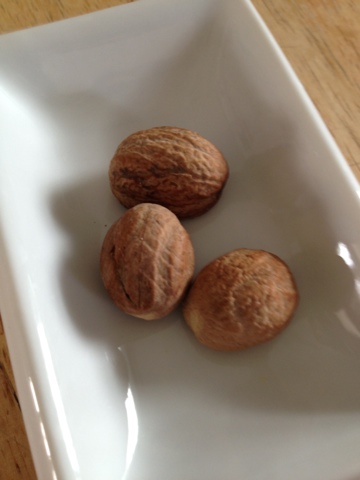
As I shared in my Grown-up Mac & Cheese recipe, I use nutmeg in many savory dishes including my chili for an added depth to the flavor that will have people asking what they are tasting. Nutmeg is the hard, brown seed from the nutmeg tree which is a tropical evergreen tree. Most cooks prefer to grate it fresh from the seed. The seed should be stored in an airtight container, away from heat, moisture and sunlight. Though there is some disagreement about storing dry spices in the freezer because they may lose potency, I do store my nutmeg seeds and my ginger root in the freezer. I pull them out and grate them fresh whenever I need them. I store them for many months, and have not noticed either losing any flavor or aroma.
Why cook with cast iron?? Cast iron is a great heat conductor so it’s the optimal choice for a perfect crisp. Well-seasoned cast iron is virtually non-stick, so you can use less oil when cooking. Cast iron, when cared for, lasts for decades.
Rockin’ Ham & Cheese Sliders
1 12 count package Hawaiian style rolls
8 oz thin sliced deli ham (Black Forest or honey smoked are both great in this recipe)
8 oz grated Swiss (Gruyere or Jarlsberg both melt well and are sharp flavors)
1 8 oz block or container of cream cheese
2 t chopped green onions, just the green (chives also work)
1/4 t dried thyme
1 stick butter, melted
2 T grated onion
2 T Worcestershire sauce
1/2 t fresh grated nutmeg
Homemade Tater Chips
3 Russet potatoes, thinly sliced
Vegetable Oil
Kosher or Sea Salt
Fresh Ground Peppercorns
Preheat the oven to 350 degrees.
 Mix together the cream cheese, nutmeg, thyme and green onions. Grate the Swiss cheese. Set aside.
Mix together the melted butter, grated onions, Parmesan cheese and Worcestershire sauce.

Thinly slice the potatoes. I use a mandolin to ensure even slices and that I still have fingers when I am done slicing. Pour about 1 1/2 inches of vegetable oil in a skillet for frying the chips. Preheat over medium high heat to 350 degrees, being careful not to go over the smoking point.

Cut the rolls in half and place the bottoms in the cast iron skillet. Top each with a couple slices of ham and some of the Swiss cheese. Spread a large dollop of the cream cheese mixture on the top roll and place on the sandwich.

Pour the butter and onion mixture of the tops of the sandwiches. Don’t try to be neat, part of the yumminess of these sliders is the cheese, butter and onions that are dripping out of the sandwiches and getting wonderfully crisp while they bake.
 Cover the skillet with foil and bake for 20-25 minutes. Remove the foil and and bake an additional 5-10 minutes to brown the tops.

While the sandwiches are baking, fry the potato chips. Take a paper towel and be sure to dry the slices. Carefully place 9-12 potato slices in the hot oil. Do not over-crowd the oil. Fry until golden brown, turning once half-way through.
 Remove the chips from the oil to a plate lines with paper towel to drain. Generously sprinkle with coarse ground sea salt or kosher salt and pepper while the chips are hot. Replace the towels between each batch.
 Serve the sliders and chips. My favorite way to eat homemade tater chips is to dip in a thick bleu cheese dressing. Mmmm!

It’s a beautiful day out and I want to toss something on the grill. I open the freezer and find very little looking back at me. I always keep a couple of packages of ground chicken on hand for my Buffalo Chicken Meatballs in case I need a quick appetizer for a get-together. So, I think…hmmm…what if I tweak that recipe and make burgers!??! I really love when an experiment turns out as tasty as it is in my mind when I am throwing it together!
Roasted Garlic Mayo
1 C Light Mayonnaise (I suppose you can use Miracle Whip if you prefer, just don’t tell me if you do!)
4-5 Roasted Garlic cloves
pinch of salt & pepper

Mix ingredients together and refrigerate until ready to use. Letting the ingredients marry for a day will give your mayo a great garlicky flavor.
Four Cheese Chicken Cheese Burgers
1 lb Ground Chicken
1 C Cheese of your choice (Feta, Mozzarella, Provolone, Parmesan, Gouda, Colby Jack, etc.)
1/2 T Minced Garlic, dried or fresh
1/2 T Chopped Onion, dried
1 T Parsley, dried (or 3 T fresh)
1/2 t Peppercorns, coarsely ground
1/2 medium Shallot, chopped

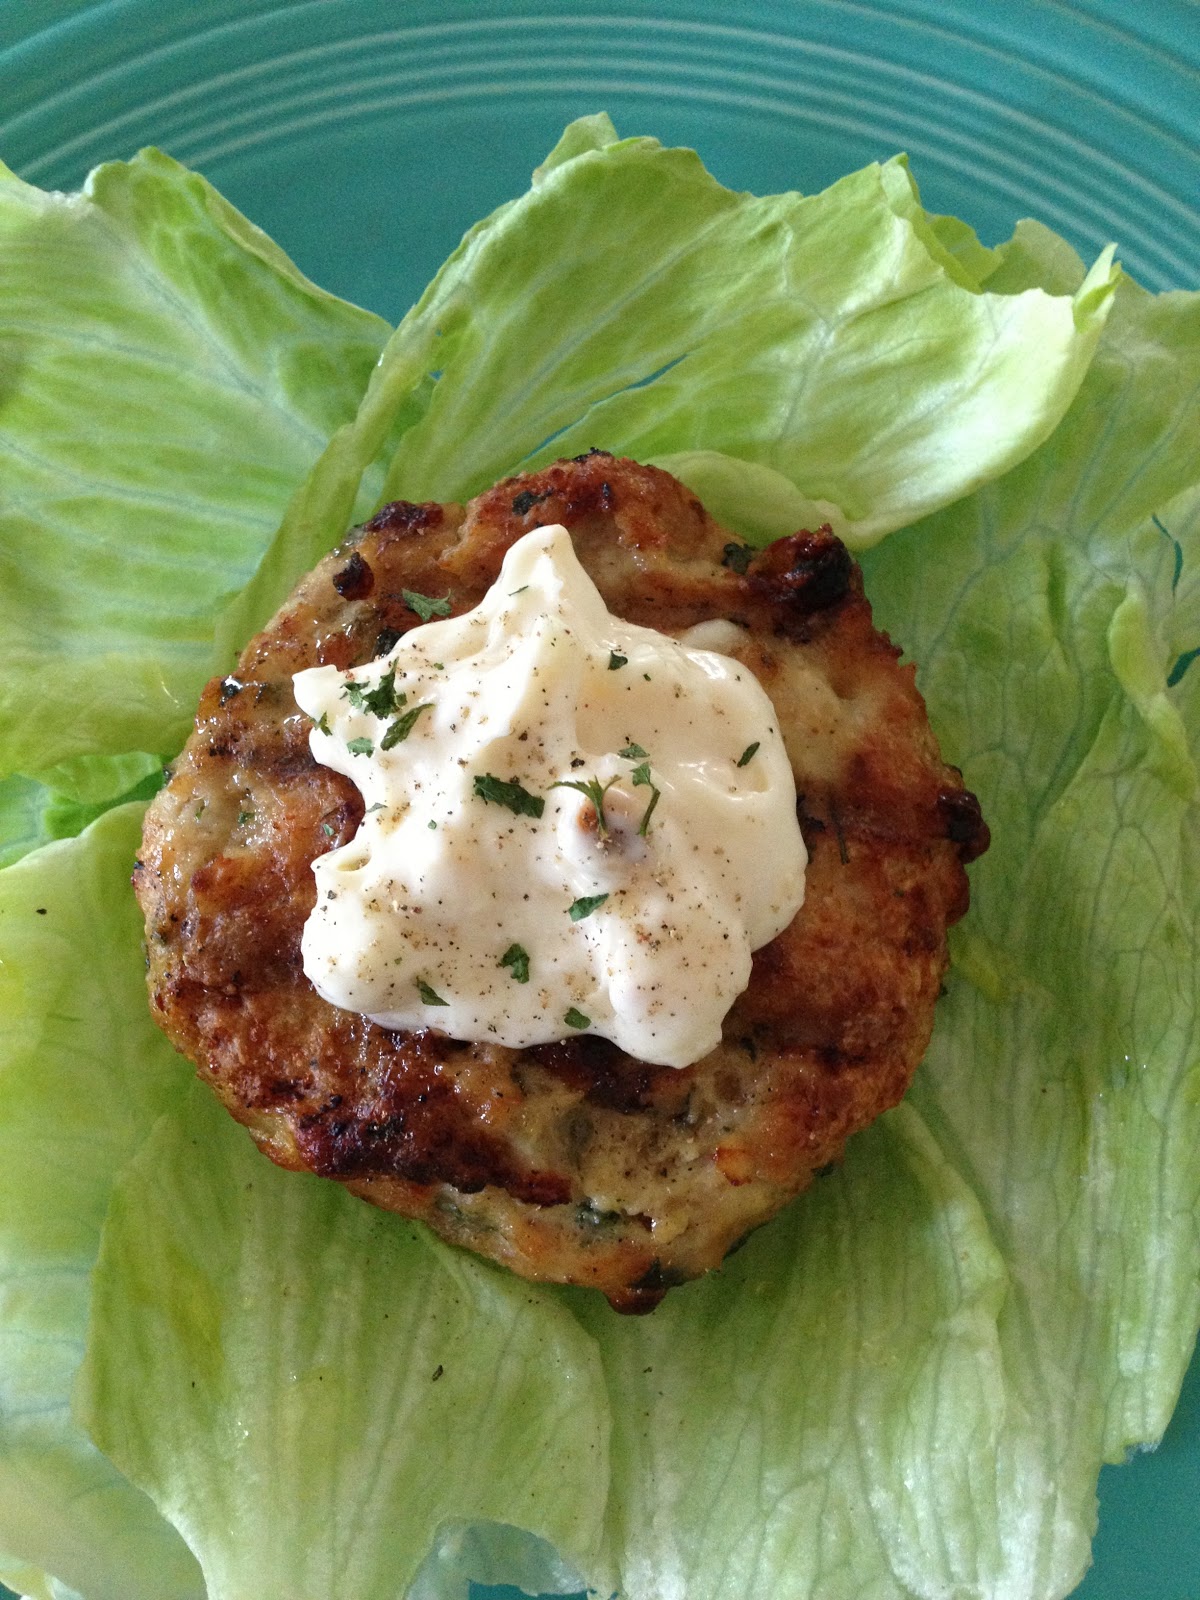
Mix all of the ingredients. Divide the meat mixture into four sections and form patties. Drizzle with olive oil. I used Garlic Infused Olive Oil from The Olive Twist. Grill at 350-400 degrees for about 8 minutes per side until fully cooked. The internal temperature should be 165 degrees and the juices should run clear. Avoid over-cooking as the burgers will be very dry.

Serve on a bed of lettuce and top with a dollop of the Roasted Garlic Mayo for a healthy burger meal. This burger would be great on a whole grain bun with lettuce, onion and avocado slices. You could also substitute Bleu cheese for the Feta and top with barbecue or buffalo sauce. Or, with Cinco de Mayo coming up, substitute Monterey Jack or Pepper Jack cheese for the Mozzarella and top the burger with guacamole and salsa . The combinations are endless!


Fun Fact: The average American eats 46 pizza slices a year (www.pizza.com)
One of America’s favorite foods: pizza, meets one of the favorite pastimes: grilling! What emerges from this interaction is a thin, crispy, smoky crust topped with fresh, flavorful toppings and smooth, melted cheese. How could this not be amazingly perfect!?!
Recently, I have noticed fire grilled pizza businesses popping up at local fairs and festivals. After just a few minutes wait, you have a tasty pizza. Well, when you see how simple these are to prepare and how much fun it can be for a family or get-together with friends, you will make grilling pizza a frequent event.
I often use a store-bought bread machine mix for an easy and fail proof dough. However, this time, my dough flopped for some reason and I ended up heading to my pantry for the ingredients for dough. I still used my bread machine so that while the dough mixes and rises I can be prepping the toppings for my pizzas. You can use whatever your preferred pizza dough is; homemade, box mix or refrigerated dough.

Pizza Dough Recipe (for bread machine)
3/4 C Warm Water
1 T Milk
1 T Oil
1 T Sugar
1/2 t Salt
2 1/4 C Flour
1 pkg Active Dry Yeast
Optional: 1 t Italian Seasoning, pinch each Garlic & Onion Powder
1 T Milk
1 T Oil
1 T Sugar
1/2 t Salt
2 1/4 C Flour
1 pkg Active Dry Yeast
Optional: 1 t Italian Seasoning, pinch each Garlic & Onion Powder
Place ingredients in the bread machine in the order listed and set on dough setting. Once done, put on a lightly floured surface and kneed a couples times. Pull apart into individual pizza size pieces and roll into balls. Cover and refrigerate until ready to use. The dough will continue to rise in the refrigerator, and that is okay. A cold rise slows the life cycle of yeast allowing the dough to develop more flavor. Pull the dough out and allow it to rest a few minutes before use. When you are ready to grill, oil your hands and press the dough onto an oiled baking sheet. Press out or roll until the dough is about 1/4 inch thick or less. Part of the fun in grilled pizza is the “rusticness” of the crust, so no need to worry if it isn’t a perfect circle. Brush on olive oil and the dough is ready for the grill.
 Time to get your toppings ready. You can use whatever your favorite pizza toppings are. Just remember, they aren’t going to have much cooking time on the grill so anything that needs to be cooked fully, like sausage, should be prepared ahead of time. Also, veggies such as mushrooms, onions and tomatoes should be sliced very thin. I love a variety of onions (Vidalia, green and red), fresh roasted garlic (how to roast garlic), fresh basil and a combination of cheeses including fresh mozzarella and a blend of grated Parmesan and Romano.
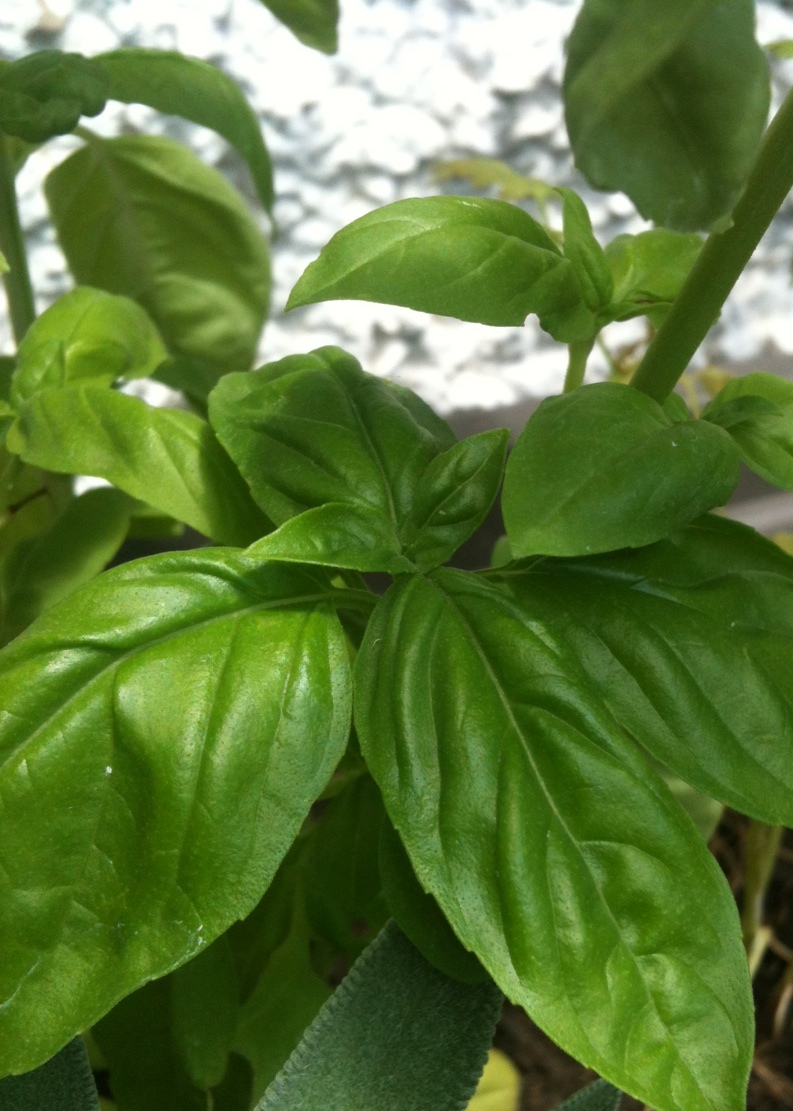
Basil
Sweet basil is a common herb used in Italian cooking. There are actually 64 species of basil. In addition to the basic clove flavor, it comes in citrus and spicy flavors such as lemon basil and anise basil. Basil is fairly easy to grow. It prefers full sunlight, temperatures above 60 degrees and regular watering. When you want to use it, just pinch off a leaf. Fresh basil is much preferred over dried because the flavor can change when dried. Basil leaves can bruise and turn dark when cut with a knife so for most recipes, just tear it with your fingers. I use so much basil that I have to plant 2-3 plants in my herb garden to keep up.
 Preheat the grill and set temperature at medium heat. Be sure the grill rack is clean so you don’t end up with remnants of your last grilled meal in your pizza crust…yuck! Brush oil on the rack. Unless you are very familiar with your grill’s temperature settings and the location of any “hot spots,” start with one [test] crust…just in case! My dough took about 3-4 minutes each side.

Now, comes the part where you have to act fast. Once you have flipped the crust over, quickly put on the desired toppings and get the lid closed so they can warm and the cheese can melt. If you are going to let others put their toppings on, you will need to remove the crust to the baking sheet while they top it and then put it back on the grill.

Cook an additional 3-4 minutes or until the bottom is grilled to your preference and the cheese is melted. I love the flavor of the slightly burnt edges of the crust and the way the fresh mozzarella cheese melts. When you bite into the pizza, you get a little of all of the textures: crunch of the crust, tender crisp vegetables and warm, soft cheeses.
The variety of pizzas you can make are endless! If someone isn’t a marinara sauce fan, have some garlic butter or an Alfredo sauce available. Garlic butter with mushrooms, spinach and grilled chicken is a great combination. The Caps and Bleu Cheese Flatbread I make would also be excellent on the grill. I could go on and on, but I am making myself hungry! So, go ahead and try grilled pizza…I bet you won’t be ordering delivery this summer!


Whenever possible I prefer to use the freshest of ingredients. Since I live in the mid-west, I have limited access, mainly mid-summer through autumn, to fresh fruits and vegetables that haven’t traveled long distances in who-knows-what kind of conditions to get to the local grocery store. So, during Farmer’s Market season, I use as much fresh produce as possible and freeze what I can. I hope to master canning this fall. I do bring my herb garden inside in the winter, so I can access fresh herbs year-round.
 We do have access to quality fresh meat thanks to the local farmers and hunters. In our community, we have several great, high quality meat shops. For this fresh ground sausage, find a large cut of pork shoulder butt. If you can get it boneless, it will save you a little time and hassle. Sometimes called just pork shoulder or pork butt, the cut comes from the upper part of the shoulder. This cut is beautifully marbled with fat and connective tissue which helps the meat to be moist and flavorful. I was able to purchase a 7 pound roast to use, and made two recipes: Maple Breakfast Sausage Patties and Italian Sausage.

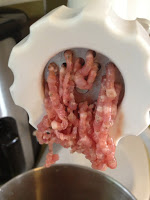
The next thing you need to have is a meat grinder. My stand mixer has a meat grinding attachment.
The two recipes have several spices in common including garlic, salt, pepper, and nutmeg. The other two spices typically found in sausage recipes are paprika and fennel seed.
Paprika is a mildly hot, sweet chili powder. It is often named for the region the peppers are from. They are dried and ground to a bright red powder.
Fennel seed comes from the fennel plant which resembles a fern. The leaves, flowers, seeds, stems and roots of the plant are all used for a variety of purposes from ornamental, to medicinal to edible. The dried seed has a flavor similar to the anise seed like black licorice.

To prepare the pork for the grinder, trim excess fat and cut into chunks. Place in a large bowl. Many recipes have you grind the meat and then blend in the spices.

However, I prefer to mix the spices into the chunks before they go through the grinder so that all of the flavors are evenly distributed throughout the meat. Mixing some water into the meat and spice mixture helps to bind it all together. Feed the mixture slowly into the grinder.
Be cautious, I discovered my meat grinder can throw raw meat about six feet across my kitchen! I found myself having to get the sausage out of my hair, off the wall and off of my clothing when I was finished. Ha!
 Maple Breakfast Sausage
3lbs Pork
2t Kosher Salt
1t fresh ground* Peppercorns
2t fresh ground Sage
2t fresh ground Thyme
1t fresh ground Parsley
1T Brown Sugar
1t fresh grated Nutmeg
1/2t Paprika
1/2t Fennel Seed
1/2C Maple Syrup
1/2C Water
 Spicy Italian Sausage

3lbs Pork
4-5 cloves Garlic, minced
1t Kosher Salt
1t fresh ground Peppercorns
1T fresh ground Parsley
1/2T Italian Seasoning
1/2t crushed Red Pepper Flakes
1/2t Paprika
1/2C Water

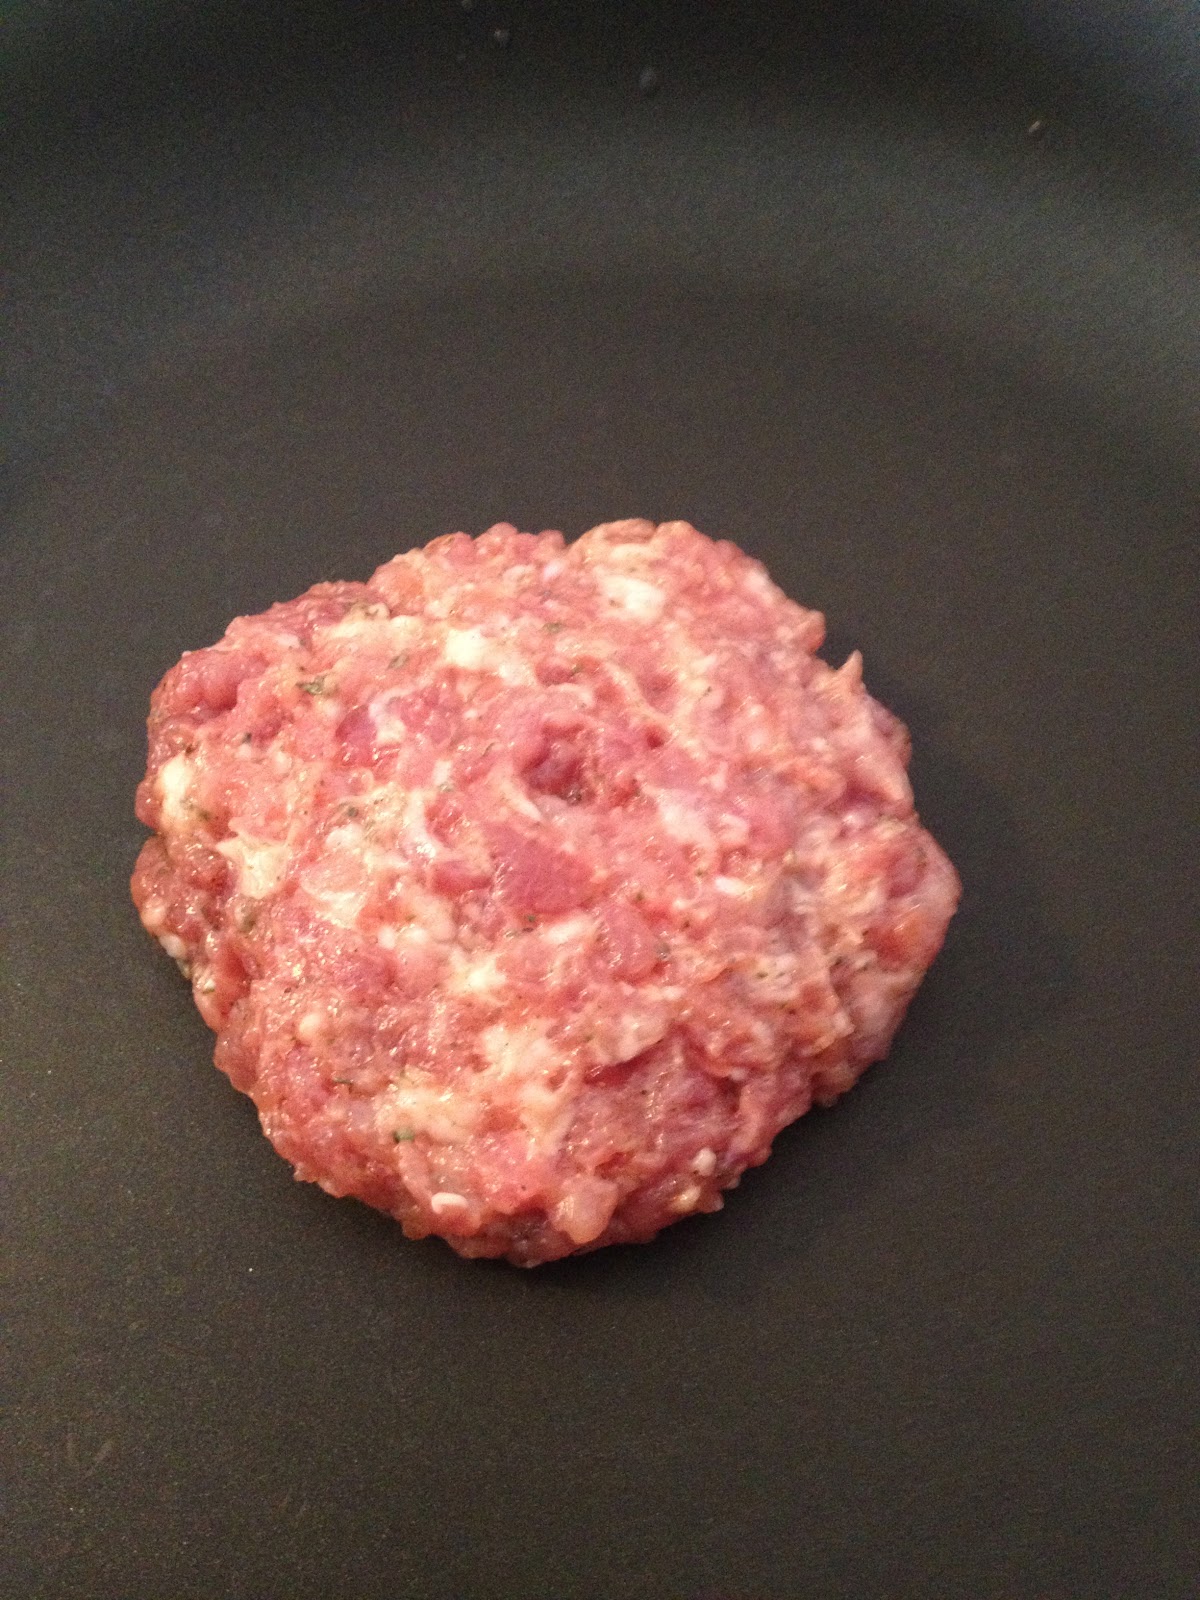
I make my sausage patties kind of large, 3lbs of sausage made about 26 patties. I then freeze the patties and pull out as many as I need for a meal, many times that meal is brinner for us (breakfast for dinner!).
The Italian sausage became one of the many tasty ingredients on the homemade pizzas for my son’s birthday party. I divided the sausage into 3 – 1lb packages. I browned one for pizza and froze the remainder.

The biggest difference between purchasing store bought, ready-made sausage and making it fresh, other than being able to control the ingredients, is the texture. Store bought sausage is almost rubbery in texture, where the fresh is tender. Depending on how much trimming you did, you will also notice a difference in the amount of grease produced while you are cooking. Making your own sausage is fun…so if you have the equipment, give it a try!!
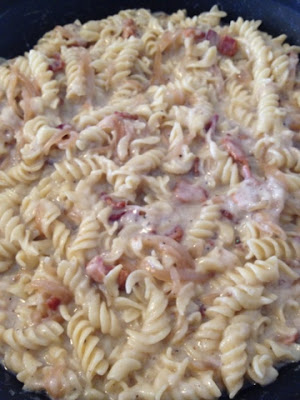

If it weren’t for comfort foods, I probably would never have to exercise again! Okay, not really. But why is it that the foods Americans so often refer to as “comfort foods” always include pasta, bread, cheese and/or gravy!??! Not the healthiest choices by far, but I am definitely an “everything in moderation” kind of girl! This recipe is one of my very favorites. I mean, how can something with cheese, caramelized onions, bacon and wine be wrong??
This recipe uses one of my favorite cheeses, Gruyere. Gruyere is a hard, yellow cheese. It is sweet but slightly salty, with a flavor that varies widely with age. It is often described as creamy and nutty when young, becoming more earthy as it ages. It is a great melting cheese and is often used in fondues, quiches, and on French onion soup.
 It also calls for an ingredient that surprises some people, nutmeg. I use nutmeg in many savory dishes including my chili for an added depth to the flavor that will have people asking what they are tasting. Nutmeg is the hard, brown seed from the nutmeg tree which is a tropical evergreen tree. Most cooks prefer to grate it fresh from the seed. The seed should be stored in an airtight container, away from heat, moisture and sunlight. Though there is some disagreement about storing dry spices in the freezer because they may lose potency, I do store my nutmeg seeds and my ginger root in the freezer. I pull them out and grate them fresh whenever I need them. I store them for many months, and have not noticed either losing any flavor or aroma.
Grown-up Mac and Cheese
1lb pasta – I prefer a short cut textured pasta such as: spiral, gemelli, cellentani, penne rigate that can grab onto the cheese
1T Olive Oil – I use my favorite Picholine from a local shop The Olive Twist (www.theolivetwist.com)
1/2lb Bacon, chopped
2 Medium Onions, thinly sliced
1/2C Wine (a dry white is great, but use whatever favorite white or blush you have on hand to drink)
2T Butter
2T Flour
1C Milk
1C Chicken Broth
2C Gruyere, shredded (regular Swiss would work fine, I just like the nuttiness of Gruyere and how well it melts)
1/2t nutmeg, fresh grated
2-3 drops Hot Sauce
1T Spicy brown or Dijon Mustard
Salt & Pepper
Cook pasta as directed on package to al dente. Don’t overcook because the pasta will continue to cook in the sauce.
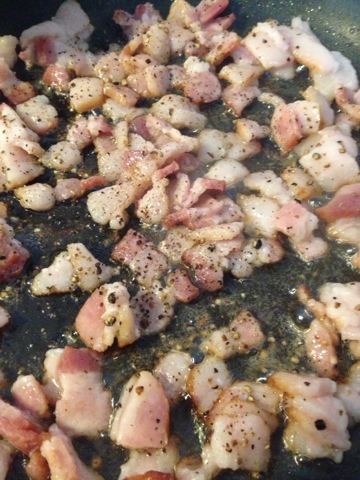
While the pasta cooks, heat olive oil in a pan. Crisp the bacon in the olive oil. Remove the bacon, reserving the oil and bacon grease in the pan.

Add the onions and cook over medium heat until softened and just beginning to caramelize. Add the wine and reduce 1-2 minutes. At this point, your kitchen will smell amazing!!

Add the onions and cook over medium heat until softened and just beginning to caramelize. Add the wine and reduce 1-2 minutes.

As the onions cook, in a saucepan, melt the butter and whisk in the flour to make a roux. After a minute or two, whisk in the broth and milk. Allow to thicken several minutes then add salt, pepper and nutmeg to taste. Add a few drops of the hot sauce. Whisk in the mustard.
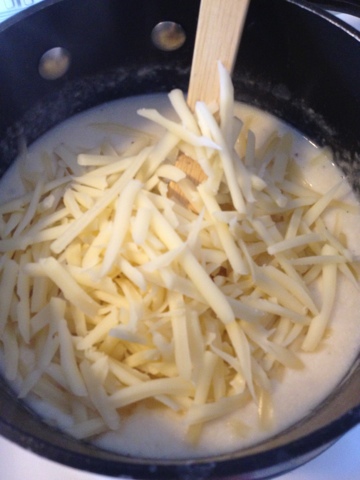
Remove from heat and stir in the shredded cheese, a little at a time to melt into the sauce.

Pour the cheese sauce into the pasta and toss together. Serve with a leafy green salad and crusty bread…and a glass of the wine you opened, of course!
Comforting Comfort Food: Grown-up Mac and Cheese
Author: Changing Seasonings
Recipe type: Lunch, Dinner
Cuisine: American
Prep time:
Cook time:
Total time:
Serves: 8 servings
Ingredients
- 1lb pasta - I prefer a short cut textured pasta such as: spiral, gemelli, cellentani, penne rigate that can grab onto the cheese
- 1T Olive Oil - I use my favorite Picholine from a local shop The Olive Twist (www.theolivetwist.com)
- ½lb Bacon, chopped
- 2 Medium Onions, thinly sliced
- ½C Wine (a dry white is great, but use whatever favorite white or blush you have on hand to drink)
- 2T Butter
- 2T Flour
- 1C Milk
- 1C Chicken Broth
- 2C Gruyere, shredded (regular Swiss would work fine, I just like the nuttiness of Gruyere and how well it melts)
- ½t nutmeg, fresh grated
- 2-3 drops Hot Sauce
- 1T Spicy brown or Dijon Mustard
- Salt & Pepper
Instructions
- Cook pasta as directed on package to al dente.
- While the pasta cooks, heat olive oil in a pan.
- Crisp the bacon in the olive oil.
- Remove the bacon, reserving the oil and bacon grease in the pan.
- Add the onions and cook over medium heat until softened and just beginning to caramelize.
- Add the wine and reduce 1-2 minutes.
- As the onions cook, in a saucepan, melt the butter and whisk in the flour to make a roux.
- After a minute or two, whisk in the broth and milk.
- Allow to thicken several minutes then add salt, pepper and nutmeg to taste.
- Add a few drops of the hot sauce.
- Whisk in the mustard.
- Remove from heat and stir in the shredded cheese, a little at a time to melt into the sauce.
- Pour the cheese sauce into the pasta and toss together.

I live in a rural part of northeast Indiana. The nearest Thai restaurant is about 45 minutes away, so when I had a Thai craving it went unsatisfied…until recently. After much searching and adapting, I have put together a Thai inspired feast that is spicy and simple.
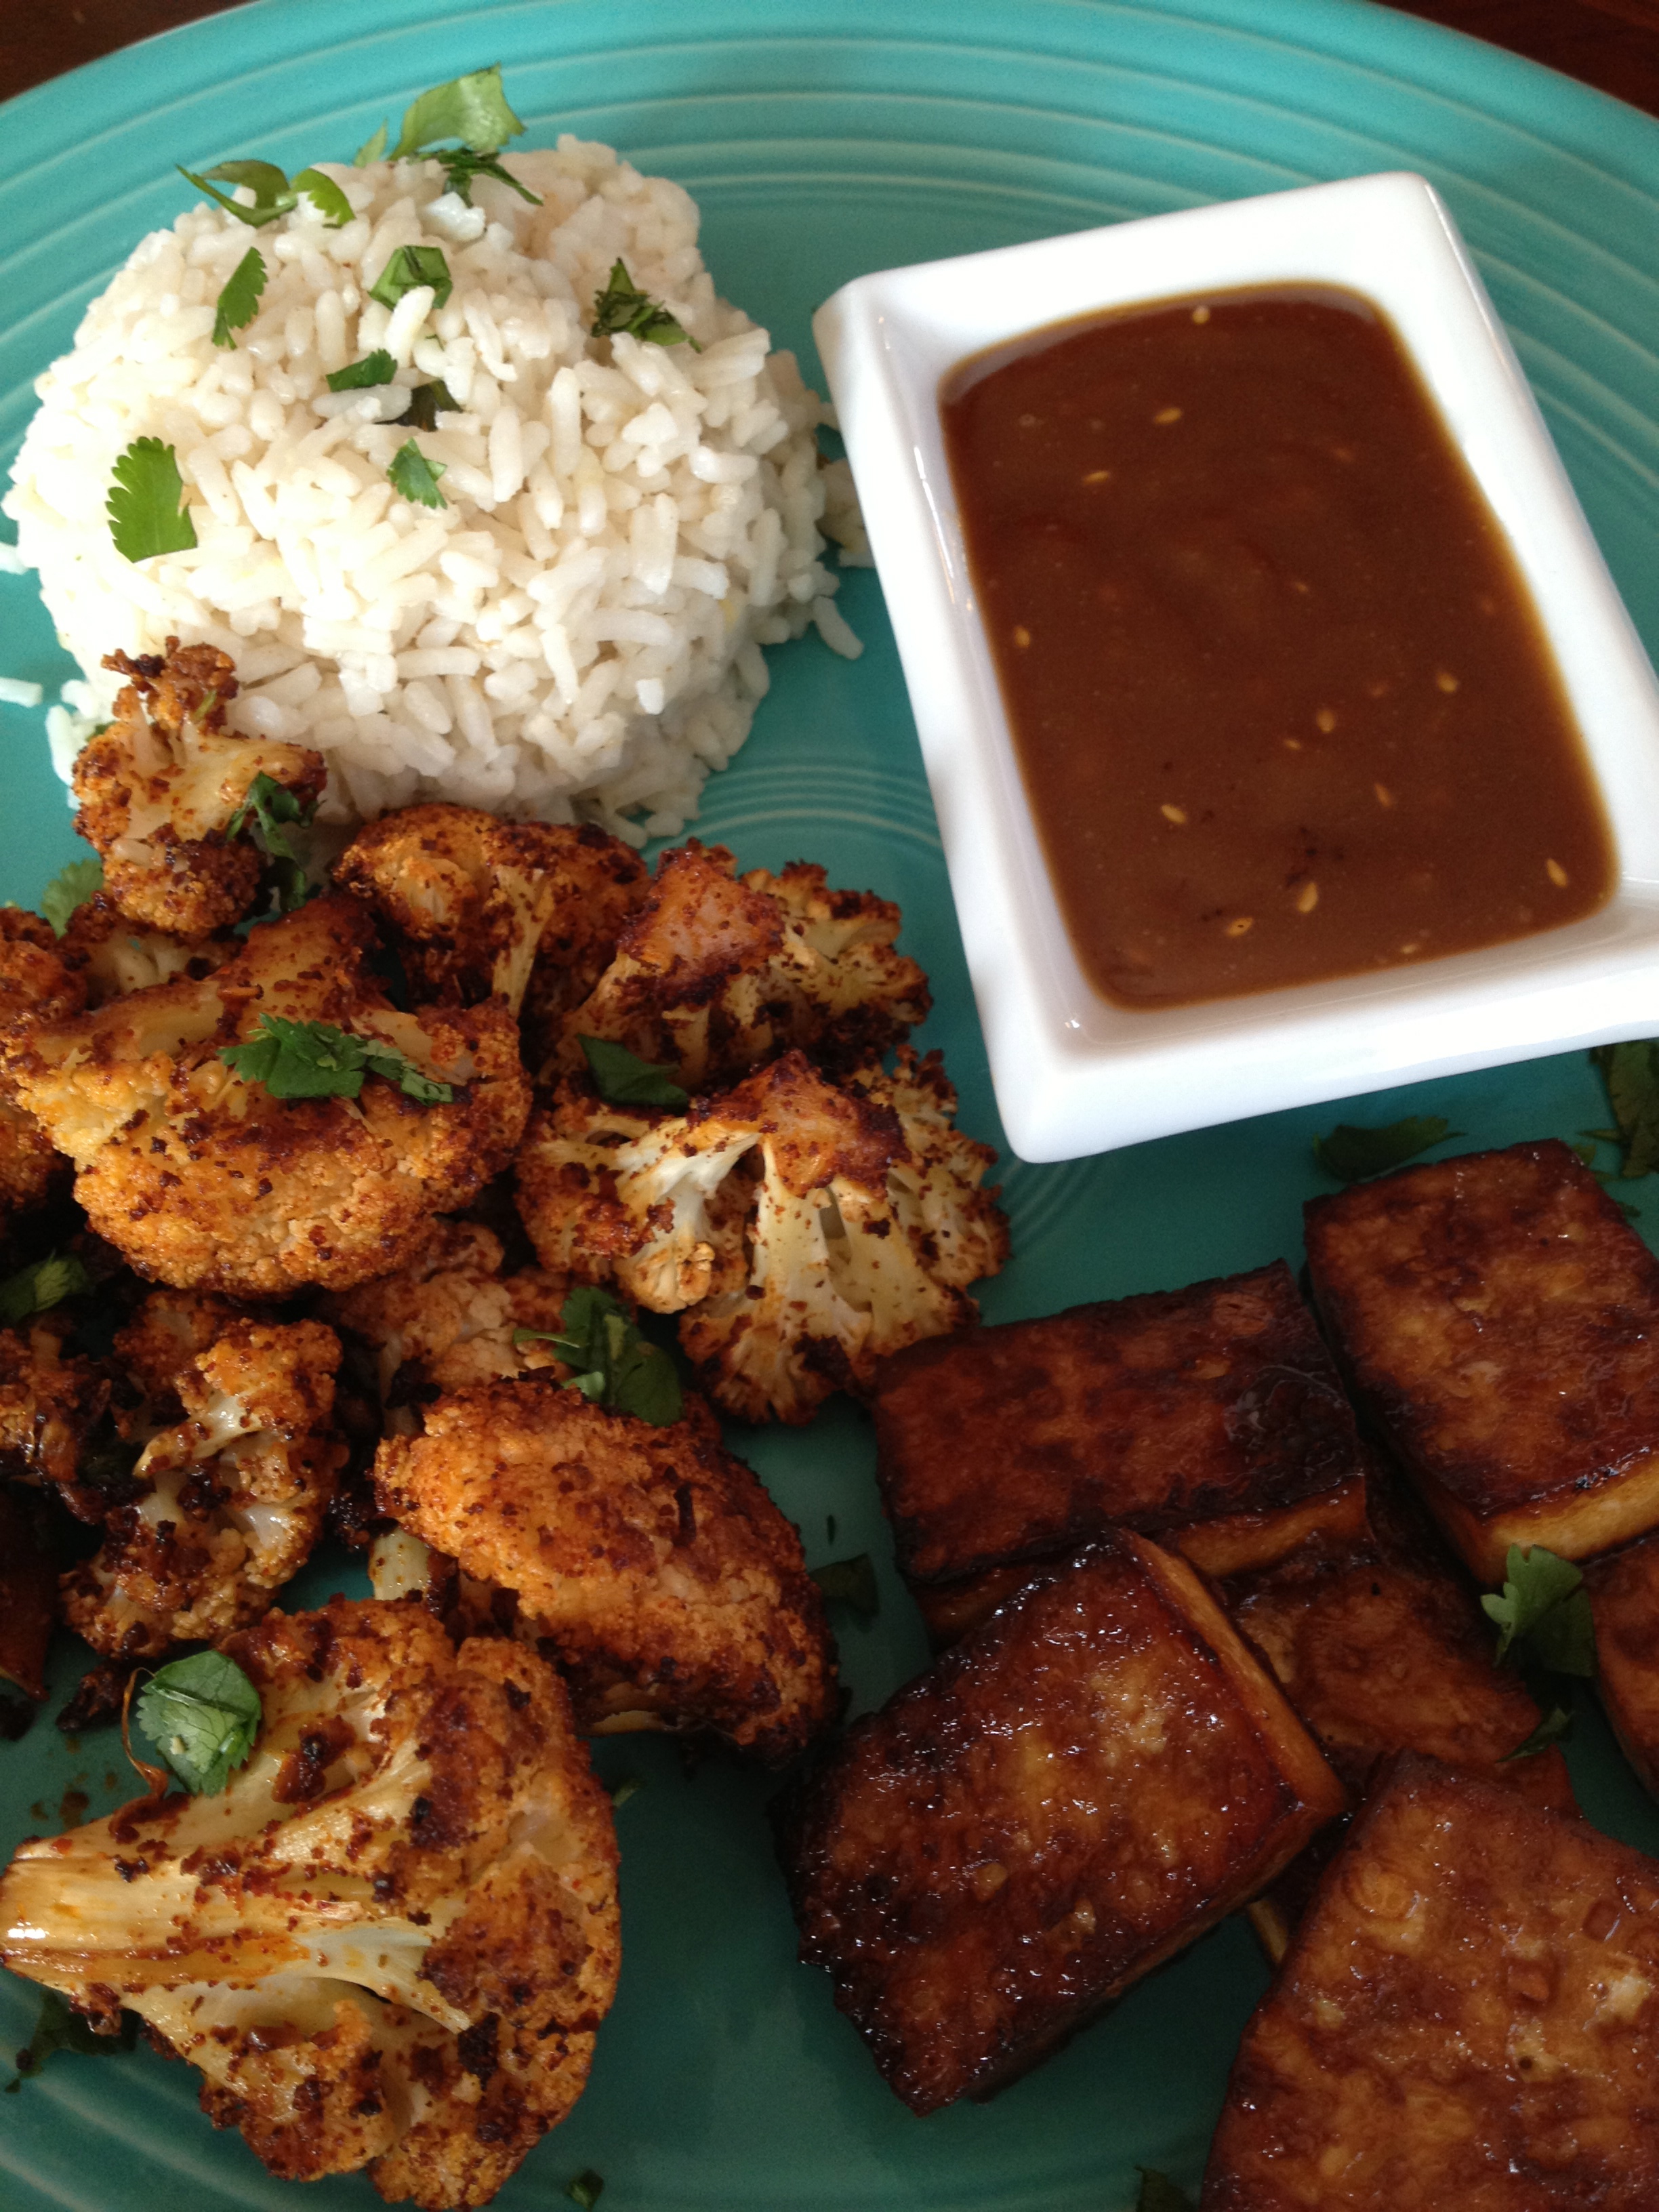
I tied together the flavors of the dishes with the crushed red chili pepper and lime. The meal includes Chili Lime Roasted Cauliflower, Chili Lime Grilled Chicken Satay Skewers and Roasted Tofu with a Thai Peanut dipping sauce on Coconut Milk Rice, and Pad Thai noodles. I love the spiciness of Thai, and all of these recipes are plenty spicy. I do not recommend adjusting the heat at all until you’ve sampled first.

First, the base of the Pad Thai, Peanut Sauce and the marinade for the Chicken and Tofu is a spicy sesame oil made by combining 1 C of Sesame Oil and 2 T crushed red chili peppers in a small saucepan and heat over medium heat for 2-3 minutes. Pour through a strainer to remove pepper flakes. Reserve oil for use in the following recipes. And, in case you skipped the last line of the previous paragraph, do not add extra pepper…this will be plenty hot!

Thai Peanut Sauce
1T Peanut Butter
2T Spicy Sesame Oil
2T Soy Sauce
1T Brown Sugar
1t Siracha Sauce
1t Sesame Seeds (I like mine toasted)
Whisk together. Set aside as dipping sauce for chicken, tofu and cauliflower.

Chili Lime Roasted Cauliflower
1 Head of Cauliflower
3 Cloves of Garlic, minced
1T Red Chili Powder
1/2t Crushed Red Pepper Flakes
1t Cumin
4T Olive Oil
1/4C Cilantro, chopped
Juice of 1/2 Lime
Kosher or Sea Salt
Preheat oven to 325 degrees. Clean the cauliflower and cut apart florets. Mix together the remaining ingredients, reserving half of the cilantro for garnish. Toss with cauliflower in a large bowl. Place on a baking sheet. Roast 1- 1 1/2 hours, turning occasionally. Garnish with a squeeze of lime juice and the remaining cilantro.
 Chili Lime Roasted Tofu

1 Tofu block, cut in 1/2 inch cubes
Juice of 1 Lime
1 Clove of Garlic, minced
1t Red Pepper Flakes
3T Spicy Sesame Oil
Mix the ingredients. Place the tofu in a dish and cover with marinade. Refrigerate for 30 minutes. Preheat oven to 400 degrees. Place tofu on a baking sheet and roast for 20 minutes. Turn halfway through cooking time.

Coconut Milk Rice
Basmati Rice
Chicken or Vegetable Broth
Coconut Milk
1t Fresh grated Ginger
1/2t Fresh ground Clove
1T Cilantro, chopped
Prepare rice as directed on package, but substitute equal amounts of broth and coconut milk for the water. Add ginger and clove. Once fluffy, toss in the chopped cilantro.

Chili Lime Chicken Satay Skewers
1lb boneless skinless chicken thighs (you can use breasts if you prefer)
3T Soy Sauce
2T Honey
1T Spicy Sesame Oil
Juice of 1 Lime
2 Cloves Garlic, minced
1-2t Siracha
Red Pepper Flakes
2T Cilantro, chopped
Bamboo Skewers (soak in water for 20 minutes so they won’t burn on the grill)
Mix the ingredients, reserving 1T of cilantro for garnish. Cut the chicken into pieces to skewer. Place the chicken in the marinade and refrigerate for an hour. Skewer the chicken pieces. Grill for 6-8 minutes per side. Garnish with lime juice, lime slices and chopped cilantro.Pad Thai
1/2C Spicy Sesame Oil
4T Brown Sugar
6T Soy Sauce
Splash of Siracha
Juice of 1 Lime
1 box Linguine, Angel Hair pasta or Rice Noodles
2T Olive Oil
1/2C Green Onion, chopped (separate greens from the whites)
1/2C Carrots, grated
1/2C Cilantro, chopped
2 Cloves Garlic, minced
1 Egg (optional)
1/2C Peanuts, roughly chopped
Mix together the first five ingredients. Set aside. Prepare noodles as directed on package. Heat olive oil over medium-high heat. Sauté the white part of the onion, carrots and garlic. Scramble in egg if desired. Reduce heat. Toss in noodles and add sauce. Garnish with chopped peanuts, green onions and cilantro.
This is a lot of food! I actually made the Pad Thai and Chicken Satay skewers with Peanut Sauce for one meal, and then had the cauliflower, tofu and rice for another meal…my meatless meal for the week. Once you have the Sesame Oil and Siracha in your pantry, these actually end up being very economical too. Considerably less than ordering take-out, if you live closer than I do to a Thai restaurant!

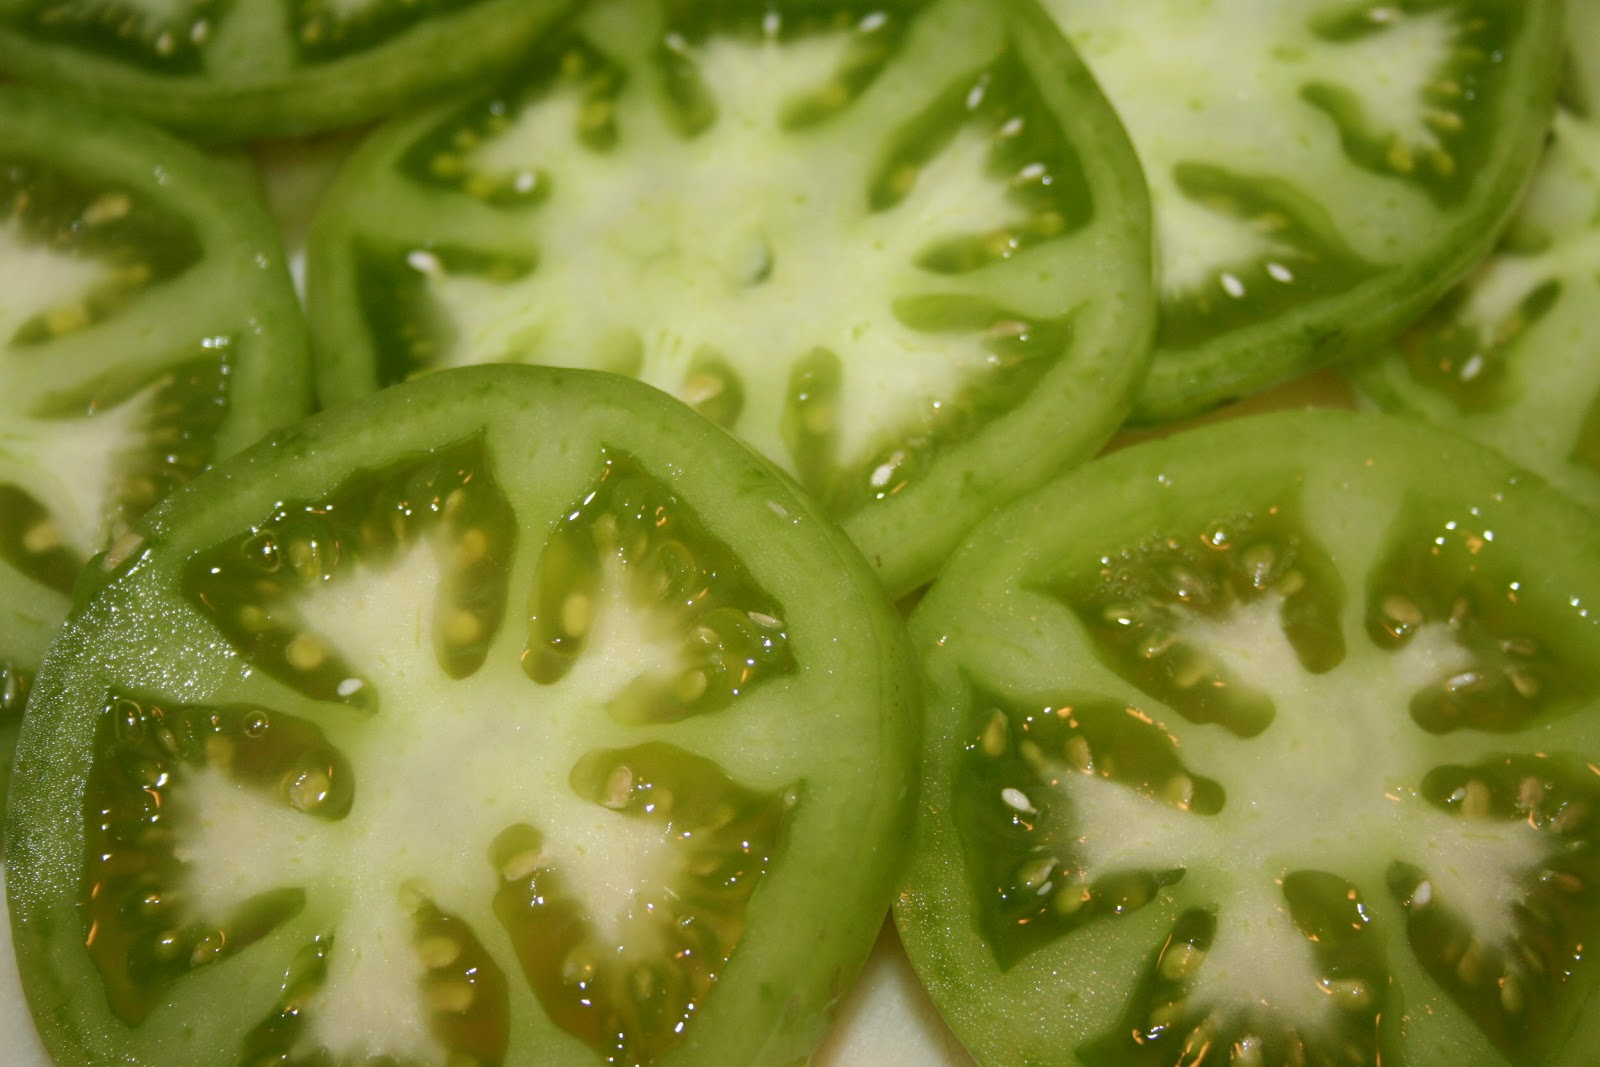
A few years ago I was introduced to beer batter chicken by a friend. It was a favorite, nearly weekly meal for he and his kids. It quickly became a requested meal by my children as well. He had used a box mix to make his batter, but I knew I could put together a batter with pantry items that are always on hand and much less expensive. Beer batter chicken night quickly expanded to beer batter chicken and onion rings, then pickles, then green tomatoes, then mushrooms, and then my favorite, garlic cloves. Now we have Beer Batter Everything night!!
The one thing I liked about the first beer batter chicken that I had, is it was in two-bite pieces, so I still prepare it like that. What I have found is that this is a perfect “eat around the kitchen island” meal. It never makes it to the table. Fried food is best hot out of the oil, crisp and salty. I put a huge serving plate in the middle of the island with a variety of dipping sauces around it, and everyone just grabs and gabs. The minute the first batch comes out of the oil, the plate is descended upon as if by vultures!
 I fry in a frying pan, though some prefer to use an electric fryer. I use a standard vegetable oil, but you can use whatever clear, flavorless oil you prefer. Just remember that it must be able to be heated to 365-375 degrees. It takes about 4 cups of oil to fill the pan so that there is about 1 1/2-2 inches of oil in the pan. A fryer will have a temperature setting. For a frying pan, you can use a deep fat frying thermometer. If you don’t have a thermometer, you can test the oil by placing the handle of a wooden spoon in the oil, if the oil bubbles around the handle, it is ready. Some also recommend tossing a small square of bread in the oil and it will brown in about a minute, or tossing in a single kernel of popcorn in and it will pop when the oil is about 360-365 degrees. I use the more discouraged method of dripping a single drop of water into the oil while standing clear of splatter, if it pops, then the oil is ready. Do not use that method unless you are familiar with what happens, to avoid being burned by the popping oil.
 Beer Batter

1 1/2 – 2 C all-purpose flour
1 lg egg
1 t garlic powder
1/2 t salt (I use garlic salt or spicy seasoned salt)
1/2 t ground pepper
1 1/2 C beer (= 1 12oz bottle beer)
Course ground Kosher or Sea Salt
Whisk all of the ingredients together in a large bowl. Be sure it is well blended. Allow to sit for a few minutes to let the beer bubbles settle.

Be sure that the pieces of food that you drop into the oil are consistent in size so they cook evenly.


Dip the food into the batter and place gently into the oil. Avoid over-crowding the pan. I put about 8-10 pieces in at a time.
 Once you have all of the pieces in the oil, use a long handled utensil to be sure they are all separated and not sticking to the bottom of the pan.
 Turn the pieces half-way through when they begin to turn a golden brown. Depending upon the temperature size of the pieces, and what type of food (meat v/s vegetable), it will take about 5-7 minutes for them to cook.
Remove with a slotted spoon and place on clean paper towel. Be sure to change the towel with each batch to keep the food from re-absorbing the oil and becoming greasy and soggy. Salt generously while still hot, then transfer to a fresh paper towel on the serving plate. If you chose to serve the food all together at the table, you can put it on a baking sheet and place in a 300 degree oven to keep it warm and crisp.

Serve with a variety of dipping sauces: BBQ, honey mustard, Ranch dressing, Buffalo Sauce, ketchup, Bleu Cheese dressing, etc.
Did I mention how much I love fried garlic cloves!?! Be sure to give them a try!! Enjoy!

Even a person who enjoys cooking as much as I do occasionally has an “I really don’t feel like cooking” day. Sometimes, for me, that means pizza or Chinese delivery. However, most of the time, it means preparing something simple yet tasty. If it is an inexpensive recipe, that’s a bonus! One of my favorite stand-by dishes lately is baked chicken thighs and legs with shallots and garlic, flavored with whatever herbs I have on hand.
This week, it was the perfect poultry blend: parsley, sage, rosemary and thyme. Such a pleasant ring, wouldn’t that make great song lyrics (wink, wink)?? I always have dried parsley in the spice cabinet. A couple weeks ago, I purchased some recently dried sage and thyme at the farmer’s market. And I still have rosemary growing in my herb garden (though, it’s getting chilly here and I’m about to bring my herbs inside for the winter). I prefer to use fresh rosemary because dried rosemary can tend to have a very hard texture that doesn’t soften even when cooked.
I use bone-in chicken pieces with the skin on. I think the meat has better flavor and it’s juicier. You can always peel the skin off after it’s cooked if you are being health conscious. My local grocery store often has the leg and thigh pieces for less than $1 per pound. I figure I feed 4-5 people for about $.78 a person for the meat. Add a vegetable, and you may spend $1 or so a person for the entire meal; considerably less expensive than ordering pizza. This dish smells so wonderful while it’s cooking!
 |
| Place the dried or fresh herbs in a spice grinder. |
Easy Baked Chicken
1 pkg chicken thighs
1 pkg chicken legs
5-6 cloves of garlic, sliced
1 large shallot, sliced
2T total of a spice blend
Olive Oil
Salt and Pepper to taste
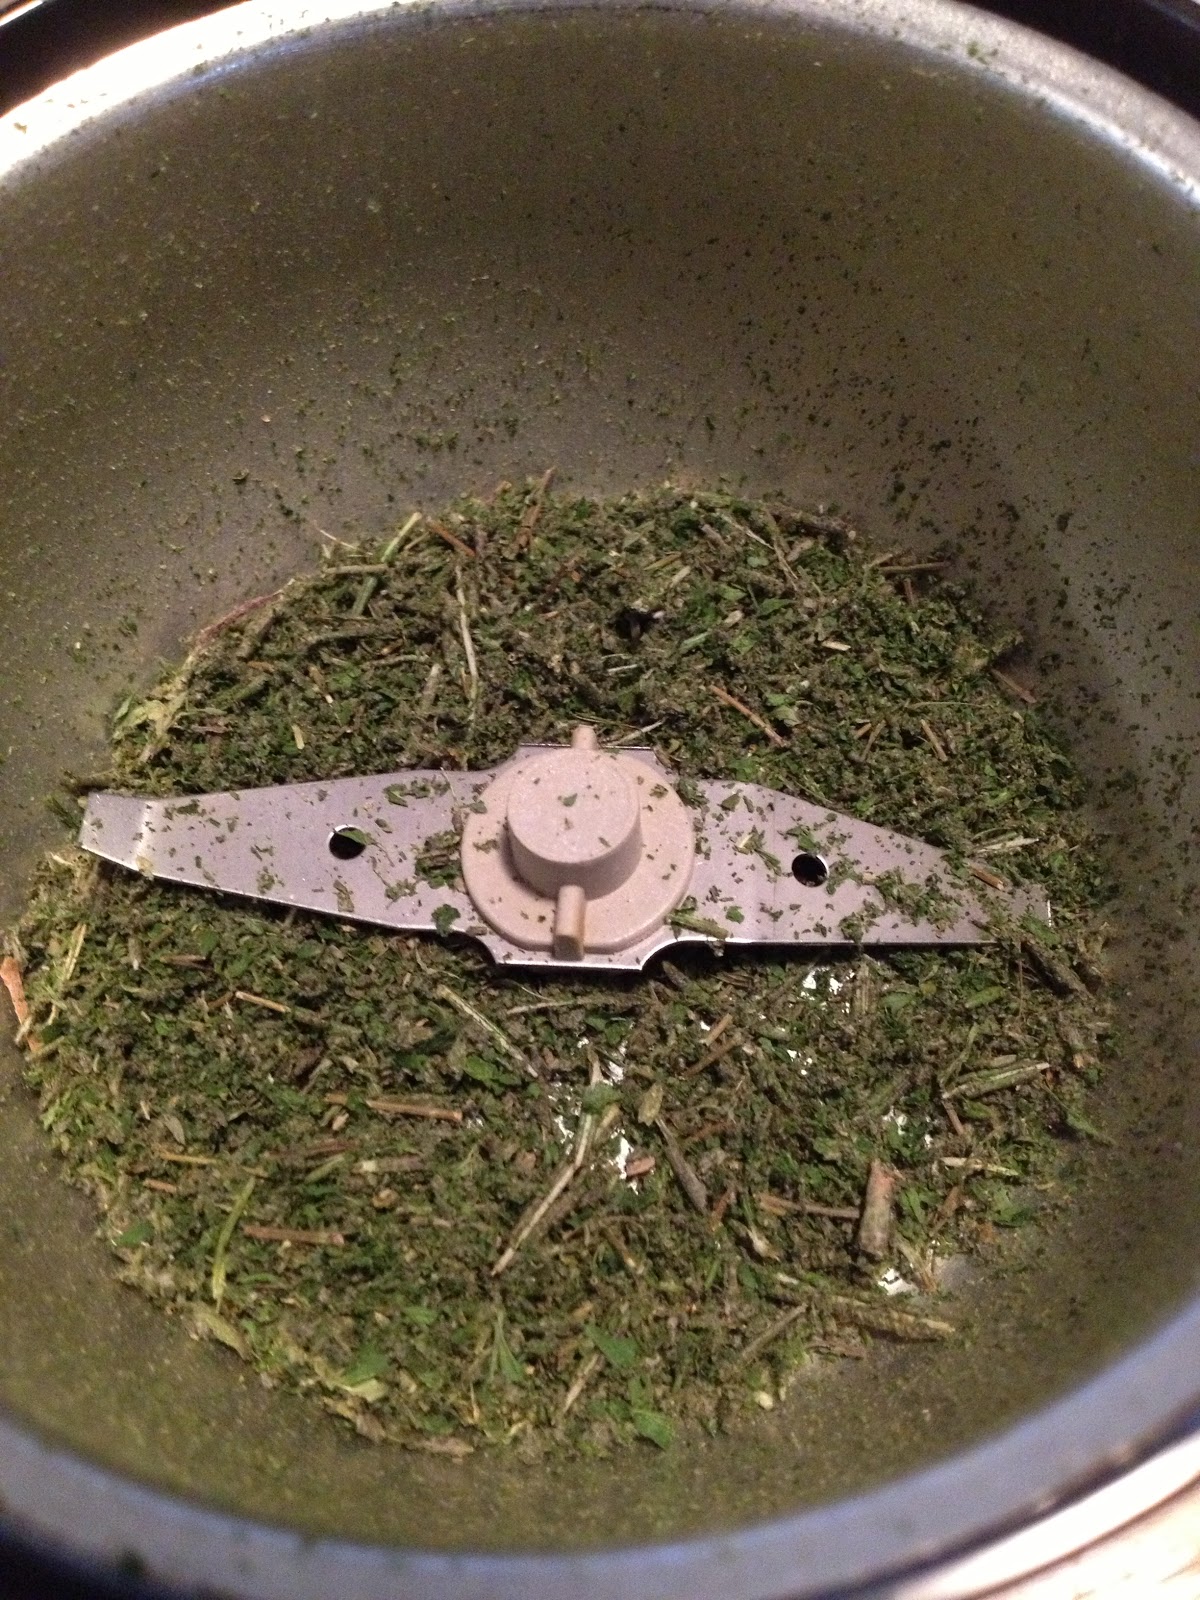 |
| Finely grind the blend. |
 |
|||
| Slice the garlic cloves and shallots. |

Place the chicken pieces in a baking dish. Salt and pepper the pieces. Drizzle with olive oil. Sprinkle the spice blend over the chicken and add the sliced garlic and shallots. Place in an oven that has been preheated to 365 degrees and bake about an hour. The chicken pieces should be cooked until the internal temperature reaches 165-170 degrees or until the juices run clear from a thigh when you pierce it with a fork. Remove from the oven and let the dish sit about ten minutes to allow the juices to re-distribute.
Another great thing about this dish, is that you can use any blend of spices you have handy or whatever fits your taste. You could make lemon pepper chicken by blending lemon zest (finely grated lemon peel), pepper and some thyme or parsley. Another tasty choice would be jerk chicken using a Caribbean jerk blend which can include dried onion, thyme, allspice, ground black pepper, cinnamon, cayenne pepper, and salt. Additional vegetables can be added as well such as mushrooms and carrots. If you don’t have shallots, substitute a small onion.

Serve with your family’s favorite vegetable, or with brown rice or mashed potatoes. Whisk up a quick gravy by heating 4T butter and 4T flour to make a roux. Whisk over medium heat until the flour mixture has a slightly nutty scent. Add the juice from the baking dish or canned chicken broth. A combination of both can be used. Continue to whisk to eliminate lumps and add a little water if additional liquid is needed to thin the gravy. Finally, add salt and pepper or a bit of the same spice blend used to season the chicken. With just a little prep time, your family can have a home-cooked meal even on a busy day…Enjoy!
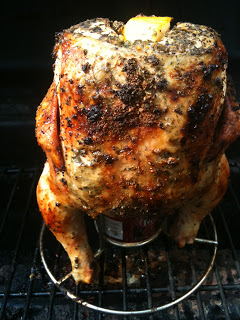
Why did the chicken cross the road? To perch itself comfortably upon a beer can on my grill, of course!!

Beer Can Chicken, Beer Bum Chicken, Beer Can Roasted Chicken…whatever you call it, the end result is the same: tender, juicy, flavorful chicken! And, for those of you who might not drink or don’t particularly care for the flavor of beer, fret not! Any can of soda can be used in place of the beer, so just insert your favorite soda (a lemon-lime soda is great for this!) wherever the blog mentions beer. If you notice, the can pictured above is actually a Dr. Pepper can, but only because we buy our beer in bottles. After I finished the pop, I rinsed the can and then poured the beer into it.
This is the perfect recipe for making a tender roasted chicken without heating up your kitchen and with minimal attention. It can be made on any type of grill, though having a grill with multiple burners is helpful because the chicken cooks with indirect heat. If you only have a single burner grill, it can still be done, just place small pieces of foil around the bottom of the chicken legs to keep them from scorching. For charcoal grills, after preheating, move the charcoal to one side of the grill for indirect heat. A few other grill tips: remove the top rack if you have one and be sure the top of your grill is deep enough to close over the chicken standing on end; preheat the entire grill, then turn the heat off on one side or the middle if there are three burners; and, it isn’t necessary to have a fancy gadget for holding the chicken because the can and two legs will serve as a tri-pod.
As with any meat dish, the spices you can chose for flavor are endless. And, as with most of my recipes, my choice is influenced by cravings and which herbs and spices I have on hand. I had a large bag of lemons in the fridge, so I went with Thyme as the basis for the rub. Thyme can have a slightly lemony flavor, and while it is potent and slow to release its flavor, it will not over-power and blends well with other spices.

Lemon-Thyme Chicken Rub:
Equal parts each – Thyme, Parsley, Coarse Ground Pepper, Garlic Salt, Celery Salt and Chives
Sprinkle about a tablespoon of the rub into the can 1/2 – 3/4 full of beer. I also squeezed some lemon juice in the beer spice mixture.


Set the beer can on a baking sheet (in a holder if you have one). Place the chicken over the can (trying to find the words to nicely say stick the beer can up the chicken’s bum).


To make a dry paste-like consistency, squeeze the juice of half a lemon and add about a teaspoon of minced fresh garlic to the rub. Reserve the other half of the lemon to put in the “head hole” at the top of the chicken to help contain the steam and juices, and add additional flavor to the chicken. A potato or an onion can also be used for this purpose.

Rub the spice mixture all over the chicken. Be sure to rub between the skin and the meat. Don’t forget to cover every part (even in it’s little arm pits…or I suppose it would be wing pits!?!). Cut a small slit just above the thigh and inset the tip of the wing (like the chicken has its “hands” in its pockets) to keep the tips of the wings from scorching. Wrap small pieces of foil around the bottom of the legs, like little shoes, to keep them from scorching.

Place the chicken on the grill over indirect heat. For a 3-4lb chicken, cook approximately 80 minutes or until the juices run clear and the internal temperature is at least 165 degrees. Because I have a three-burner grill, I rotate the bird about every 20 minutes to ensure even browning.

Let the chicken stand for 5 minutes before cutting to allow the juices to redistribute. The meat will be so tender that you will be able to just pull the chicken apart. Even the breasts, which tend to be dry, will be moist and juicy.


Even though the skin is not the healthiest part of the chicken, it will be impossible to resist! When my children say, “eeeew! I don’t want that part!” I get so disappointed…wink, wink! We paired the chicken with some fresh green beans, steamed until tender crisp and then sautéed in a little olive oil, real butter, minced fresh garlic and a squeeze of lemon juice to tie the flavors together. Corn on the cob goes great as well. Enjoy this start to the grilling season!
Another summer favorite is a great use for any leftover chicken! The last time I grilled one of these tasty birds, I was the only one eating it. And that meant, tons of leftovers. So, I used the meat in a creamy, crunchy, sweet and savory chicken salad…Mmmm! I cleaned the remaining meat off of the bone and cut it into chunks. I added light mayonnaise, thinly sliced celery, red grapes, green onion, honey roasted almond slices and a little salt, fresh ground peppercorns and dill weed. For an added flavor, I tossed in some dried blueberries. Dried cranberries or cherries would be good too.
