Crispy Fried Eggplant

Once upon a time, my mom came for a visit.  She swooped in the door with a plate wrapped in paper towel and said, “you have to try this…it’s like eating eggplant chips!” They weren’t even warm, but they were crisp and flavorful.  Very tasty! So, it was time to experiment a crispy fried eggplant recipe.  This fried eggplant is great to just munch on by itself, but it also pairs perfectly with the simple tomato basil sauce in an upcoming post.

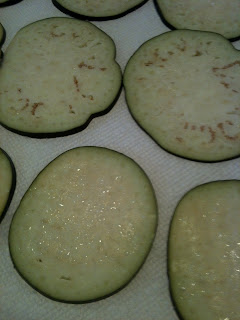
Eggplant is a vegetable that has bragging rights for being near the top of the list of “Brain Foods” due to it’s fiber content, vitamins, minerals and antioxidant properties.  It is a flavorful and versatile food.  Though there are many varieties, the typical eggplant found in America is pear-shaped and purple in color.  Eggplant should be firm and the skin smooth and shiny without scars or discoloration.  They are very perishable, so plan on using within a few days of purchase.  Do not clean or cut prior to storing.  Eggplant can be eaten with or without the skin, which can sometimes be bitter.  To prepare eggplant for use, cut it with a stainless steel knife and sweat the liquid out of the vegetable by placing it on paper towel and sprinkling it with salt.  Let sit for about 30 minutes and then dab the excess liquid off with another paper towel.  If you need to, you can rinse to remove the rest of the salt.  For this recipe, I leave the salt.


There are so many options for the breading.  To keep this recipe simple, store bought crumbs are the easiest though they do have a higher sodium and sugar (corn syrup) content.  A benefit of store bought crumbs is that they can be purchased with Italian seasoning.  If you don’t have bread crumbs on hand, you can make your own with bread, crackers or even cereal.  Just pulse in a food processor or spice grinder.  Add Italian seasoning and you have seasoned breadcrumbs with control of the ingredients.  If you do not have pre-mixed Italian Seasoning, you can make it by blending dried basil, oregano, thyme, rosemary, and marjoram. Some also include black pepper, garlic and red pepper flakes.  For a healthier version of store bought breadcrumbs that have less additives and cook nice and crisp, use Panko breadcrumbs.  For this recipe, I add grated Parmesan cheese to the breadcrumbs.


Crispy Fried Eggplant

1 Medium Eggplant with skin on, thinly sliced and sweated
1-2+ T Course ground Kosher Salt or Sea Salt (regular table salt will work)
1 1/2 – 2 C Seasoned Breadcrumbs
Binder for breading (this can be a couple eggs or egg whites beaten with a liquid added such as water or milk, or just milk)
1/4 C Grated Parmesan Cheese
Olive Oil* (to cover the bottom of the pan about 1/4 in)
*Higher quality, extra virgin olive oils have a higher smoke point or can be heated higher without burning.  I use my favorite oil from a local shop, The Olive Twist (www.theolivetwist.com).
Because this is what I would consider a lightly breaded recipe, I don’t use the typical three-step dredging process.  Set-up your area like a little assembly line: frying pan with heated olive oil, bowl of seasoned bread crumbs and cheese mixture, bowl of egg/milk, sliced eggplant already sweated.  I try to use the wet hand – dry hand method, but typically goof up and use the wrong hand so I end up with fingers that look like Sasquatch fingers.  Dip the eggplant in the liquid and then transfer to the breadcrumbs.  Cover completely with breadcrumbs by flipping the piece over.  Place gently in the heated oil.  Because these are so very thinly sliced, they do not take long to cook.  Fry a few minutes on each side until a golden brown.
Remove from the pan and place on paper towel to remove excess oil.  Remember to constantly change the paper towel to keep the food from reabsorbing the oil and becoming soggy.  Sprinkle with salt.  This is one of those things that are lucky if they make it to a plate because I eat them as quickly as they come out of the pan! Keep warm on a baking sheet in a low temperature oven.

Serve with your favorite pasta topped with marinara for a perfect Eggplant Parmesan. Sprinkle additional Parmesan cheese or top with melted mozzarella.

 

Quiche: A Second Chance for Holiday Leftovers

As I mentioned before, all of the wonderful holiday gatherings we attend bless us with the opportunity to visit with family and friends, and with an abundance of leftover meats, cheeses and vegetables.  A couple days after Christmas, I woke craving quiche. What a perfect use for the leftovers in my refrigerator!

I love to cook, however baking is not really one of my strong skills.  Probably because it requires more precise measurements and I rarely measure anything (in fact, I often struggle to figure out the actual measurements for the recipes I post in this blog!), and because it seems to take a bit more patience.  This crust is very simple and forgiving.

Crust

2 1/2 C Flour
2 sticks cold butter – cut
1 t Salt
1 t Sugar
4 T (+ up to 4 T more) Ice Water

Mix the flour, salt and sugar in a bowl.  Add the butter, mix into the flour with a pastry cutter.  Blend until the mixture is crumbly.  Add the ice water, 1 tablespoon at a time and work into the flour with your hands.  Be careful not to over work it.  When the dough forms, divide in half and form to balls.

Press into disks between plastic wrap and refrigerate for at least an hour.  Roll dough onto a flour surface until it’s about 14in round.  Roll onto the rolling pin and transfer to pie dish.  Press into the dish and form the edges of the crust.  For those of us who aren’t pastry chefs, the term “rustic” was invented.  I just smoosh (highly technical cooking term!) the crust so that it’s even around the dish.


Quiche Filling

6 eggs
1 C Low-fat small curd Cottage Cheese
1 C shredded Swiss Cheese
1/3 C each chopped green onion, chopped red pepper and crumbled bacon (I would have added mushrooms too if I had any!)
1/2 C Ham
1/2 t each parsley, thyme, salt, pepper (I also added a pinch of fire salt)
1/4 C grated Parmesan
Beat the eggs and stir in the cottage and Swiss cheeses.
Add the meat and vegetables.
Blend parsley, thyme, salt and pepper.  Add to egg mixture.
Add grated Nutmeg.
Pour into the pie crust and sprinkle the Parmesan cheese on top.

Bake at 375 degrees for about 40 minutes or until the crust is golden brown and the quiche is firm in the middle.  I put the broiler on for a couple minutes to brown the cheese on the top. This quiche is light and moist.  Serve with fruit for a tasty breakfast, lunch or dinner.  It is just as wonderful warmed the next day too!!


Leftover Cheese Tray = Tasty Cheese Sauce

Ahh the holidays! Food, food and more food! It never fails that more than one typically non-cooking friend or family member brings a cheese tray to the holiday gathering.  Now, don’t get me wrong…I adore cheese! However, you will inevitably have cheese left over after your event and there is only so much cheese and crackers any of us can handle.  Other than using it for a toasty grilled ham and cheese, there is something very simple you can do with all that cheese.  A quick cheese sauce.  The cheese sauce can become a creamy fondue that can turn that leftover veggie tray into a fun and tasty meal.  It can also be used as a base for a turkey tetrazzini or homemade macaroni and cheese.

Cheese Sauce

(for about 4 cups of sauce)
4 T Flour
4 T Butter
3 C Milk
4-6 oz Cheese (variety of types)
Hot Sauce (several drops)
1/2 t Nutmeg (fresh, grated)

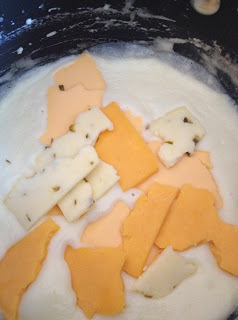
Start by making a roux.  The amount will depend on the amount of sauce you want to make.  A roux is basically made from equal parts of butter (or some fat) to flour.  Melt butter over medium high heat.  Add flour, whisking for several minutes until the mixture turns a light brown and a nutty scent develops.  Make a béchamel sauce by pouring in milk slowly, whisking constantly.  The mixture will thicken.  Continue to add milk to desired consistency.  Add the cheese.  When I am using leftover cheese tray slices, I just tear them as I put them in the pan.  Add several drops of hot sauce and grated nutmeg.

You now have a versatile cheese sauce that can be the base for so many recipes.  Add cooked pasta for a homemade macaroni and cheese.  To utilize other holiday leftovers such as meats or crudités, stir in pasta, leftover turkey, chicken or ham and peas, mushrooms or broccoli and bake for a tetrazzini casserole.  Or, put in a fondue pot and serve with  fresh vegetables, day old bread chunks, fresh fruits and pretzels.

Beer Batter Everything!!

A few years ago I was introduced to beer batter chicken by a friend.  It was a favorite, nearly weekly meal for he and his kids.  It quickly became a requested meal by my children as well.  He had used a box mix to make his batter, but I knew I could put together a batter with pantry items that are always on hand and much less expensive.  Beer batter chicken night quickly expanded to beer batter chicken and onion rings, then pickles, then green tomatoes, then mushrooms, and then my favorite, garlic cloves.  Now we have Beer Batter Everything night!!

The one thing I liked about the first beer batter chicken that I had, is it was in two-bite pieces, so I still prepare it like that.  What I have found is that this is a perfect “eat around the kitchen island” meal.  It never makes it to the table.  Fried food is best hot out of the oil, crisp and salty.  I put a huge serving plate in the middle of the island with a variety of dipping sauces around it, and everyone just grabs and gabs.  The minute the first batch comes out of the oil, the plate is descended upon as if by vultures!

I fry in a frying pan, though some prefer to use an electric fryer.  I use a standard vegetable oil, but you can use whatever clear, flavorless oil you prefer.  Just remember that it must be able to be heated to 365-375 degrees.  It takes about 4 cups of oil to fill the pan so that there is about 1 1/2-2 inches of oil in the pan. A fryer will have a temperature setting.  For a frying pan, you can use a deep fat frying thermometer.  If you don’t have a thermometer, you can test the oil by placing the handle of a wooden spoon in the oil, if the oil bubbles around the handle, it is ready.  Some also recommend tossing a small square of bread in the oil and it will brown in about a minute, or tossing in a single kernel of popcorn in and it will pop when the oil is about 360-365 degrees.  I use the more discouraged method of dripping a single drop of water into the oil while standing clear of splatter, if it pops, then the oil is ready.  Do not use that method unless you are familiar with what happens, to avoid being burned by the popping oil.

Beer Batter

1 1/2 – 2 C all-purpose flour
1 lg egg
1 t garlic powder
1/2 t salt (I use garlic salt or spicy seasoned salt)
1/2 t ground pepper
1 1/2 C beer (= 1 12oz bottle beer)
Course ground Kosher or Sea Salt

Whisk all of the ingredients together in a large bowl.  Be sure it is well blended.  Allow to sit for a few minutes to let the beer bubbles settle.

Be sure that the pieces of food that you drop into the oil are consistent in size so they cook evenly.

Dip the food into the batter and place gently into the oil.  Avoid over-crowding the pan.  I put about 8-10 pieces in at a time.

Once you have all of the pieces in the oil, use a long handled utensil to be sure they are all separated and not sticking to the bottom of the pan.

Turn the pieces half-way through when they begin to turn a golden brown.  Depending upon the temperature size of the pieces, and what type of food (meat v/s vegetable), it will take about 5-7 minutes for them to cook.

Remove with a slotted spoon and place on clean paper towel.  Be sure to change the towel with each batch to keep the food from re-absorbing the oil and becoming greasy and soggy.  Salt generously while still hot, then transfer to a fresh paper towel on the serving plate.  If you chose to serve the food all together at the table, you can put it on a baking sheet and place in a 300 degree oven to keep it warm and crisp.


Serve with a variety of dipping sauces: BBQ, honey mustard, Ranch dressing, Buffalo Sauce, ketchup, Bleu Cheese dressing, etc.

Did I mention how much I love fried garlic cloves!?! Be sure to give them a try!! Enjoy!