Breakfast in Bed: Blueberry Bacon Waffles

One of the primary reasons I started this blog is because I was so often hearing people say how they cook, but they prepared the same foods all of the time and they were bored with their meals.  Adding herbs, spices and other flavorings to the most simple recipes can totally change the meal.  Be slightly creative with how you present the food, and your partner, family and friends will see you are an amazing cook!

Making something from scratch, or homemade, is healthier, less expensive and can actually be more simple to prepare than you think.  A perfect example is pancakes, waffles, cake mixes and breads or biscuits.  Instead of spending money on store bought baking mixes, all you need are a few basic pantry items such as flour, baking soda, salt and sugar.

I added vanilla, almond extract and cinnamon to a basic waffle recipe.  The flavor takes on almost a desert-like quality.  Sweetness also comes from the blueberries. The bacon (I use applewood smoked) gives just a touch of salt, so the waffles become the perfect combination of salty-sweet.  Honestly, though I served the waffles with syrup and whipped cream, they are tasty with nothing on them at all.

For this recipe, you do need to have a waffle iron.  Though a fancy Belgian waffle iron makes wonderfully thick, fluffy waffles, any waffle iron will do.  One quick trick for knowing when your waffle is done: when the steam stops, it’s ready.

Blueberry Bacon Waffles

2 C Flour
4 t Baking Soda
1 T Sugar
1/2 t Salt
2 Med-Lg Eggs
1 3/4 C Milk
1/2 C Vegetable Oil
1/8 – 1/4 t Cinnamon, ground (optional, if you use fresh ground, use the lesser amount)
1 t Almond Extract
2 t Vanilla
1 1/2 C Blueberries (rinsed and drained) Other fruits can be substituted…strawberries are great!
12-14 Slices of Bacon
(Makes 6-7 waffles in my waffle iron)
Beat eggs by hand in a large mixing bowl.  Add remaining ingredients up to the vanilla and blend by hand until the lumps disappear.  Set aside and do not disturb until you are ready to use the batter.  Stirring again will remove the air and lead to less fluffy waffles.
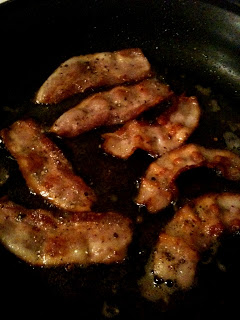
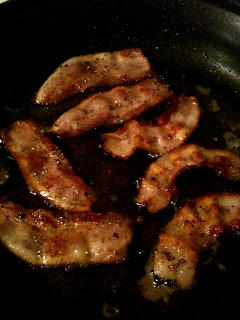
Cook bacon slices to tender-crisp.  Drain grease on paper towel.  Rinse and drain blueberries.  Let dry in colander.
Prepare your waffle iron.  Preheat.  Even if the iron is non-stick, oil or spray with cooking spray before the first waffle to keep the waffles from sticking.
Place about 3/4 cup of the batter (or follow waffle iron instructions for amount) on the iron. Add a handful of blueberries and two slices of bacon, then close iron.

Serve with butter, maple syrup and/or whipped cream (I do ALL three!!)  Leftovers, if you have any, can be placed in a freezer bag and warmed in the microwave for about 1 – 1 1/2 minutes.

Update: I recently used strawberries in place of the blueberries and the waffles were just as yummy!!


Grinding! No, Not the dance: Fresh Ground Sausage

Whenever possible I prefer to use the freshest of ingredients.  Since I live in the mid-west, I have limited access, mainly mid-summer through autumn, to fresh fruits and vegetables that haven’t traveled long distances in who-knows-what kind of conditions to get to the local grocery store.  So, during Farmer’s Market season, I use as much fresh produce as possible and freeze what I can.  I hope to master canning this fall.  I do bring my herb garden inside in the winter, so I can access fresh herbs year-round.

We do have access to quality fresh meat thanks to the local farmers and hunters.  In our community, we have several great, high quality meat shops.  For this fresh ground sausage, find a large cut of pork shoulder butt.  If you can get it boneless, it will save you a little time and hassle.  Sometimes called just pork shoulder or pork butt, the cut comes from the upper part of the shoulder.  This cut is beautifully marbled with fat and connective tissue which helps the meat to be moist and flavorful.  I was able to purchase a 7 pound roast to use, and made two recipes: Maple Breakfast Sausage Patties and Italian Sausage.

The next thing you need to have is a meat grinder.  My stand mixer has a meat grinding attachment.

The two recipes have several spices in common including garlic, salt, pepper, and nutmeg.  The other two spices typically found in sausage recipes are paprika and fennel seed.

Paprika is a mildly hot, sweet chili powder.  It is often named for the region the peppers are from.  They are dried and ground to a bright red powder.

Fennel seed comes from the fennel plant which resembles a fern.  The leaves, flowers, seeds, stems and roots of the plant are all used for a variety of purposes from ornamental, to medicinal to edible.  The dried seed has a flavor similar to the anise seed like black licorice.

To prepare the pork for the grinder, trim excess fat and cut into chunks.  Place in a large bowl.  Many recipes have you grind the meat and then blend in the spices.

However, I prefer to mix the spices into the chunks before they go through the grinder so that all of the flavors are evenly distributed throughout the meat.  Mixing some water into the meat and spice mixture helps to bind it all together.  Feed the mixture slowly into the grinder.

Be cautious, I discovered my meat grinder can throw raw meat about six feet across my kitchen! I found myself having to get the sausage out of my hair, off the wall and off of my clothing when I was finished.  Ha!

Maple Breakfast Sausage

3lbs Pork
2t Kosher Salt
1t fresh ground* Peppercorns
2t fresh ground Sage
2t fresh ground Thyme
1t fresh ground Parsley
1T Brown Sugar
1t fresh grated Nutmeg
1/2t Paprika
1/2t Fennel Seed
1/2C Maple Syrup
1/2C Water

Spicy Italian Sausage

3lbs Pork
4-5 cloves Garlic, minced
1t Kosher Salt
1t fresh ground Peppercorns
1T fresh ground Parsley
1/2T Italian Seasoning
1/2t crushed Red Pepper Flakes
1/2t Paprika
1/2C Water

I make my sausage patties kind of large, 3lbs of sausage made about 26 patties.  I then freeze the patties and pull out as many as I need for a meal, many times that meal is brinner for us (breakfast for dinner!).

The Italian sausage became one of the many tasty ingredients on the homemade pizzas for my son’s birthday party.  I divided the sausage into 3 – 1lb packages.  I browned one for pizza and froze the remainder.


The biggest difference between purchasing store bought, ready-made sausage and making it fresh, other than being able to control the ingredients, is the texture.  Store bought sausage is almost rubbery in texture, where the fresh is tender.  Depending on how much trimming you did, you will also notice a difference in the amount of grease produced while you are cooking.  Making your own sausage is fun…so if you have the equipment, give it a try!!

Quiche: A Second Chance for Holiday Leftovers

As I mentioned before, all of the wonderful holiday gatherings we attend bless us with the opportunity to visit with family and friends, and with an abundance of leftover meats, cheeses and vegetables.  A couple days after Christmas, I woke craving quiche. What a perfect use for the leftovers in my refrigerator!

I love to cook, however baking is not really one of my strong skills.  Probably because it requires more precise measurements and I rarely measure anything (in fact, I often struggle to figure out the actual measurements for the recipes I post in this blog!), and because it seems to take a bit more patience.  This crust is very simple and forgiving.

Crust

2 1/2 C Flour
2 sticks cold butter – cut
1 t Salt
1 t Sugar
4 T (+ up to 4 T more) Ice Water

Mix the flour, salt and sugar in a bowl.  Add the butter, mix into the flour with a pastry cutter.  Blend until the mixture is crumbly.  Add the ice water, 1 tablespoon at a time and work into the flour with your hands.  Be careful not to over work it.  When the dough forms, divide in half and form to balls.

Press into disks between plastic wrap and refrigerate for at least an hour.  Roll dough onto a flour surface until it’s about 14in round.  Roll onto the rolling pin and transfer to pie dish.  Press into the dish and form the edges of the crust.  For those of us who aren’t pastry chefs, the term “rustic” was invented.  I just smoosh (highly technical cooking term!) the crust so that it’s even around the dish.


Quiche Filling

6 eggs
1 C Low-fat small curd Cottage Cheese
1 C shredded Swiss Cheese
1/3 C each chopped green onion, chopped red pepper and crumbled bacon (I would have added mushrooms too if I had any!)
1/2 C Ham
1/2 t each parsley, thyme, salt, pepper (I also added a pinch of fire salt)
1/4 C grated Parmesan
Beat the eggs and stir in the cottage and Swiss cheeses.
Add the meat and vegetables.
Blend parsley, thyme, salt and pepper.  Add to egg mixture.
Add grated Nutmeg.
Pour into the pie crust and sprinkle the Parmesan cheese on top.

Bake at 375 degrees for about 40 minutes or until the crust is golden brown and the quiche is firm in the middle.  I put the broiler on for a couple minutes to brown the cheese on the top. This quiche is light and moist.  Serve with fruit for a tasty breakfast, lunch or dinner.  It is just as wonderful warmed the next day too!!


Walking Omelets

Each year, in March, my children and I celebrate Dr. Suess’s birthday with a tasty and colorful meal of green eggs and ham.  It is a tradition that evolved into one of my son’s favorite meals.  The amusing part is that he will not eat scrambles eggs with ham if I don’t add the green food coloring, go figure! So, when I discovered this recipe, I had to adapt it for him.  Please feel free to leave out the food coloring, and know that I’m speaking from experience when I tell you that some colors do NOT go well with scrambled eggs (at least not if you want anyone over age 9 to try them!).  Blue turns to a lifeless grey color, not appetizing at all! However, red makes for a great breakfast for say, um…Halloween.

The recipe actually caught my attention because I am terrible about having a healthy breakfast during the week.  This is an easy way to be sure that some protein makes its way into my body to jump start my metabolism, and avoid that mid-morning snacking session.

If you prefer, you can substitute the eggs for the appropriate equivalent of egg whites or pourable egg mixture.

Walking Omelets

12 eggs
3/4-1 C chopped meat (ham, bacon, sausage, etc.)
3/4-1 C shredded cheese (use your favorite, but the sharper flavored hard cheeses work great)
1-1 1/2 C chopped vegetables (green onion, broccoli, mushrooms, red pepper, etc.)
1-2 t salt (I prefer a flavored salt, garlic or cayenne pepper are flavorful)
1 t fresh ground rainbow pepprcorn
1/2 T parsley (fresh or dried work)
muffin pan or silicone muffin cups, sprayed lightly with cooking spray

Preheat oven to 375 degrees.  Scramble the eggs.  You can add a bit of milk, cream or even cold water if that is your preference.  Cold water helps the eggs to be lighter and fluffier.  Add the spices and continue to beat until airy.  Place some of the meat, cheese and vegetable mixture in the bottom of each muffin cup.  Pour the egg mixture to fill each cup to 3/4 full.  Bake for 25-30 minutes or until firm and lightly browned.

Refrigerate to eat through the week.  The omelets will be good for the week refrigerated, but can also be frozen.  Allow to thaw before microwaving.  Microwaves vary, and you don’t want the egg to become rubbery, so you will have to test to see how long it takes to warm through (my microwave takes about 30 seconds, but I’ve seen some recipes call for 2 minutes in the microwave…I would then have hockey pucks!)

As you can see, I didn’t name these “walking omelets” just because you can warm it and walk out the door to work or school, ours actually have feet!

For the Green Eggs and Ham version: add several drops of green food coloring to egg mixture (and for my child, omit all vegetables!)

International Bacon Day 2012

What!??! Bacon has it’s own holiday??? Of course it does! Every wonderful thing in the world that deserves to be celebrated has a holiday: the day we are born, weddings, historic events and people, days of religious significance…I could go on and on.  Some holidays are local or regional, like “Fair Day” in the county where I live.  Every country has special days, such as their own Independence Day.  Of course, there are the favorites of retail shops and advertisers everywhere: the “Hallmark Holidays” like Sweetest Day (as if single people needed yet another reminder of their status a mere 8 months after Valentine’s Day!).  Then there are the fun, wacky, sometimes serious, theme-based daily, weekly and monthly observances.  Among my favorites: National Gummy Bear Day (July 15), National Pickle Day (November 14), and Squirrel Appreciation Day (January 21).  I bet you are wondering about that last one!?! And, though I truly believe that bacon should be celebrated everyday, there is International Bacon Day (September 1).

So, how did I celebrate Bacon Day last weekend?? With everything bacon, of course! I started the morning filling the house with the amazing aroma of peppered bacon frying (see: http://changingseasonings.blogspot.com/2012/03/can-bacon-really-be-any-tastier-yep.html).  Later in the day, I made spicy, cheese-stuffed, bacon-wrapped grilled jalapenos to snack on.  Then, for dinner, zesty roasted cabbage drizzled with a maple-balsamic glaze and sprinkled with…you guessed it – bacon!

Grilled Stuffed Bacon-Wrapped Jalapenos

6-8 large Jalapenos
6-8 slices bacon
1 8oz pkg cream cheese
Optional: favorite cheeses (I used Colby-Jack and Bleu-Jack.  String cheese works well too!)
Small skewers

Wash the jalapenos and leave them whole.  Make a slice through one side from about a 1/4 in. below the stem to 1/4 in. from the tip.  Using a small metal vegetable peeler tip or the handle of a table spoon, scrape out the seeds and veins, being careful not to split the pepper.

Stuff the pepper with the cheese.  If using a block cheese in addition to the cream cheese, cut the cheese to size and tuck in the slit in the pepper.  Then fill the remainder of the space with the cream cheese.  Do not over-fill the pepper or you will have a mess when you cook it.  Wrap a slice of bacon around the pepper and secure with a skewer.  If you are using wooden skewers, be sure to soak them for about an hour prior to using them so they are less likely to burn.  Place the peppers on the grill (you can use a grill pan if necessary) and grill on medium-high.  Turn the peppers to evenly roast the peppers and keep the bacon from burning.  Cook until the peppers are roasted, the bacon is browned and the cheese is melted.

Roasted Cabbage with Maple Balsamic Glaze

1 head of cabbage
6 T Balsamic Vinegar (I get my favorite from a local Olive Oil and Vinegar shop: www.theolivetwist.com)
4 T Maple Syrup
Kosher or Sea Salt
Cracked Peppercorn
Olive Oil
3 slices of bacon cooked and crumbled

Wash the Cabbage and peel of any wilted outer leaves.  Slice the cabbage in rounds about 1-1 1/2 in. thick.  Lay on a baking sheet and drizzle generously with olive oil.  Sprinkle with salt and pepper.  Roast in the oven at 400 degrees for 40-45 minutes.

Mix the vinegar, maple syrup and a pinch of the salt in a small saucepan over medium heat until boiling.  Plate the roasted cabbage and drizzle with the glaze.  Top with the crumbled bacon.

Can Bacon Really Be Any Tastier? Yep! Just Add Pepper…Ask My Dog!
I’m here, I’m here!! Sorry for the delay…I’ve been slightly incapacitated.  We have a dog…a very large dog.  He’s actually still a puppy, but he’s a Mastiff so he’s double the size of most full grown large dogs.  He decided to have an adventure this week and pushed his way out the door.  In the process of catching him and encouraging him to return to the house, I injured my elbow…ouch! So, I was supposed to take it easy and not use the arm for a few days (yeah, right…I’m a mom!).  I’m snickering as I type this because he’s laying on the sofa he has claimed as his throne, snoring away…so sweet and innocent!
Okay, this is supposed to be a food blog, not a dog blog, but here’s something funny…the one last thing I was going to mention about peppercorns, before changing the topic, involves the dog! I mentioned in an earlier blog how surprised my friends and family were because it took several posts before I mentioned one of my true food loves: BACON!! Now, bacon itself is a wonderfully tasty treat, and probably the single reason why I could never become a vegetarian, but jazz it up with some fresh coarsely ground peppercorns and it’s even better!  How does this involve the dog?? Well, we don’t make a habit of feeding him people food, but on the weekends, he knows that mommy is going to be frying bacon.  He will walk over to his morning food, look at it, look at me, and then walk away from the food bowl and plop himself on the floor right in the middle of the kitchen waiting patiently for the sizzling bacon renderings to be poured over his food.  Then he feasts like the king he thinks he is!
Yes, you can purchase pepper bacon…some types more flavorful than others.  However, peppering it yourself puts you in control of the type of peppercorns, the freshness of the pepper and the quantity of pepper used.  Here are a few basic bacon tips: find a brand that you love and stick with it…surprisingly, that does not always mean the most expensive brand.  I love the thick cut bulk bacon from a local meat shop and I also love the store brand bulk packages from the grocery.  Cut the bacon in half (a tip I learned years ago from a friend’s mother) to make the pieces more manageable to cook and eat…they will lay better in the frying pan and not curl up as much.  Cook until perfectly tender-crisp…do this by adjusting the temperature you cook the bacon so that both the meat and the fat cook evenly.  Press the pieces flat and snip the fat curls to make them lay better.  Some people prefer to cook their bacon in the oven on a broiler pan so that the bacon fat drips away from the meat, and the bacon cooks flat and evenly.  Coarsely grind rainbow peppercorns and sprinkle generously over the bacon as it cooks.


We all know that there are aspects of bacon that may not be real high on the healthful food attribute list.  American style bacon is made from a cut of fatty pig belly that is cured in a salt brine (sodium nitrates) and sometimes flavored with maple or brown sugar.  By cooking bacon until it is crisp, much of the fat is rendered out.  However, you should avoid cooking it at high temperature for long periods because the nitrates can turn to nitrosamine, known for negative health effects.  Okay, now I sound like a prescription medication commercial listing all of the negative side effects that have people wondering why they would ever take it!!  So, ignore most of that last paragraph and just EAT MORE BACON!!