Beer Batter Everything!!

A few years ago I was introduced to beer batter chicken by a friend.  It was a favorite, nearly weekly meal for he and his kids.  It quickly became a requested meal by my children as well.  He had used a box mix to make his batter, but I knew I could put together a batter with pantry items that are always on hand and much less expensive.  Beer batter chicken night quickly expanded to beer batter chicken and onion rings, then pickles, then green tomatoes, then mushrooms, and then my favorite, garlic cloves.  Now we have Beer Batter Everything night!!

The one thing I liked about the first beer batter chicken that I had, is it was in two-bite pieces, so I still prepare it like that.  What I have found is that this is a perfect “eat around the kitchen island” meal.  It never makes it to the table.  Fried food is best hot out of the oil, crisp and salty.  I put a huge serving plate in the middle of the island with a variety of dipping sauces around it, and everyone just grabs and gabs.  The minute the first batch comes out of the oil, the plate is descended upon as if by vultures!

I fry in a frying pan, though some prefer to use an electric fryer.  I use a standard vegetable oil, but you can use whatever clear, flavorless oil you prefer.  Just remember that it must be able to be heated to 365-375 degrees.  It takes about 4 cups of oil to fill the pan so that there is about 1 1/2-2 inches of oil in the pan. A fryer will have a temperature setting.  For a frying pan, you can use a deep fat frying thermometer.  If you don’t have a thermometer, you can test the oil by placing the handle of a wooden spoon in the oil, if the oil bubbles around the handle, it is ready.  Some also recommend tossing a small square of bread in the oil and it will brown in about a minute, or tossing in a single kernel of popcorn in and it will pop when the oil is about 360-365 degrees.  I use the more discouraged method of dripping a single drop of water into the oil while standing clear of splatter, if it pops, then the oil is ready.  Do not use that method unless you are familiar with what happens, to avoid being burned by the popping oil.

Beer Batter

1 1/2 – 2 C all-purpose flour
1 lg egg
1 t garlic powder
1/2 t salt (I use garlic salt or spicy seasoned salt)
1/2 t ground pepper
1 1/2 C beer (= 1 12oz bottle beer)
Course ground Kosher or Sea Salt

Whisk all of the ingredients together in a large bowl.  Be sure it is well blended.  Allow to sit for a few minutes to let the beer bubbles settle.

Be sure that the pieces of food that you drop into the oil are consistent in size so they cook evenly.

Dip the food into the batter and place gently into the oil.  Avoid over-crowding the pan.  I put about 8-10 pieces in at a time.

Once you have all of the pieces in the oil, use a long handled utensil to be sure they are all separated and not sticking to the bottom of the pan.

Turn the pieces half-way through when they begin to turn a golden brown.  Depending upon the temperature size of the pieces, and what type of food (meat v/s vegetable), it will take about 5-7 minutes for them to cook.

Remove with a slotted spoon and place on clean paper towel.  Be sure to change the towel with each batch to keep the food from re-absorbing the oil and becoming greasy and soggy.  Salt generously while still hot, then transfer to a fresh paper towel on the serving plate.  If you chose to serve the food all together at the table, you can put it on a baking sheet and place in a 300 degree oven to keep it warm and crisp.


Serve with a variety of dipping sauces: BBQ, honey mustard, Ranch dressing, Buffalo Sauce, ketchup, Bleu Cheese dressing, etc.

Did I mention how much I love fried garlic cloves!?! Be sure to give them a try!! Enjoy!


Walking Omelets

Each year, in March, my children and I celebrate Dr. Suess’s birthday with a tasty and colorful meal of green eggs and ham.  It is a tradition that evolved into one of my son’s favorite meals.  The amusing part is that he will not eat scrambles eggs with ham if I don’t add the green food coloring, go figure! So, when I discovered this recipe, I had to adapt it for him.  Please feel free to leave out the food coloring, and know that I’m speaking from experience when I tell you that some colors do NOT go well with scrambled eggs (at least not if you want anyone over age 9 to try them!).  Blue turns to a lifeless grey color, not appetizing at all! However, red makes for a great breakfast for say, um…Halloween.

The recipe actually caught my attention because I am terrible about having a healthy breakfast during the week.  This is an easy way to be sure that some protein makes its way into my body to jump start my metabolism, and avoid that mid-morning snacking session.

If you prefer, you can substitute the eggs for the appropriate equivalent of egg whites or pourable egg mixture.

Walking Omelets

12 eggs
3/4-1 C chopped meat (ham, bacon, sausage, etc.)
3/4-1 C shredded cheese (use your favorite, but the sharper flavored hard cheeses work great)
1-1 1/2 C chopped vegetables (green onion, broccoli, mushrooms, red pepper, etc.)
1-2 t salt (I prefer a flavored salt, garlic or cayenne pepper are flavorful)
1 t fresh ground rainbow pepprcorn
1/2 T parsley (fresh or dried work)
muffin pan or silicone muffin cups, sprayed lightly with cooking spray

Preheat oven to 375 degrees.  Scramble the eggs.  You can add a bit of milk, cream or even cold water if that is your preference.  Cold water helps the eggs to be lighter and fluffier.  Add the spices and continue to beat until airy.  Place some of the meat, cheese and vegetable mixture in the bottom of each muffin cup.  Pour the egg mixture to fill each cup to 3/4 full.  Bake for 25-30 minutes or until firm and lightly browned.

Refrigerate to eat through the week.  The omelets will be good for the week refrigerated, but can also be frozen.  Allow to thaw before microwaving.  Microwaves vary, and you don’t want the egg to become rubbery, so you will have to test to see how long it takes to warm through (my microwave takes about 30 seconds, but I’ve seen some recipes call for 2 minutes in the microwave…I would then have hockey pucks!)

As you can see, I didn’t name these “walking omelets” just because you can warm it and walk out the door to work or school, ours actually have feet!

For the Green Eggs and Ham version: add several drops of green food coloring to egg mixture (and for my child, omit all vegetables!)

Cheap and Easy…Baked Chicken that is!

Even a person who enjoys cooking as much as I do occasionally has an “I really don’t feel like cooking” day.  Sometimes, for me, that means pizza or Chinese delivery.  However, most of the time, it means preparing something simple yet tasty.  If it is an inexpensive recipe, that’s a bonus!  One of my favorite stand-by dishes lately is baked chicken thighs and legs with shallots and garlic, flavored with whatever herbs I have on hand.

This week, it was the perfect poultry blend: parsley, sage, rosemary and thyme.  Such a pleasant ring, wouldn’t that make great song lyrics (wink, wink)??  I always have dried parsley in the spice cabinet.  A couple weeks ago, I purchased some recently dried sage and thyme at the farmer’s market.  And I still have rosemary growing in my herb garden (though, it’s getting chilly here and I’m about to bring my herbs inside for the winter).  I prefer to use fresh rosemary because dried rosemary can tend to have a very hard texture that doesn’t soften even when cooked.

I use bone-in chicken pieces with the skin on.  I think the meat has better flavor and it’s juicier.  You can always peel the skin off after it’s cooked if you are being health conscious.  My local grocery store often has the leg and thigh pieces for less than $1 per pound.  I figure I feed 4-5 people for about $.78 a person for the meat.  Add a vegetable, and you may spend $1 or so a person for the entire meal; considerably less expensive than ordering pizza.  This dish smells so wonderful while it’s cooking!

Place the dried or fresh herbs in a spice grinder.

Easy Baked Chicken

1 pkg chicken thighs
1 pkg chicken legs
5-6 cloves of garlic, sliced
1 large shallot, sliced
2T total of a spice blend
Olive Oil
Salt and Pepper to taste

Finely grind the blend.
Slice the garlic cloves and shallots.

Place the chicken pieces in a baking dish.  Salt and pepper the pieces.  Drizzle with olive oil.  Sprinkle the spice blend over the chicken and add the sliced garlic and shallots.  Place in an oven that has been preheated to 365 degrees and bake about an hour.  The chicken pieces should be cooked until the internal temperature reaches 165-170 degrees or until the juices run clear from a thigh when you pierce it with a fork.  Remove from the oven and let the dish sit about ten minutes to allow the juices to re-distribute.

Another great thing about this dish, is that you can use any blend of spices you have handy or whatever fits your taste.  You could make lemon pepper chicken by blending lemon zest (finely grated lemon peel), pepper and some thyme or parsley.  Another tasty choice would be jerk chicken using a Caribbean jerk blend which can include dried onion, thyme, allspice, ground black pepper, cinnamon, cayenne pepper, and salt.  Additional vegetables can be added as well such as mushrooms and carrots.  If you don’t have shallots, substitute a small onion.

Serve with your family’s favorite vegetable, or with brown rice or mashed potatoes.  Whisk up a quick gravy by heating 4T butter and 4T flour to make a roux. Whisk over medium heat until the flour mixture has a slightly nutty scent.  Add the juice from the baking dish or canned chicken broth.  A combination of both can be used. Continue to whisk to eliminate lumps and add a little water if additional liquid is needed to thin the gravy.  Finally, add salt and pepper or a bit of the same spice blend used to season the chicken.  With just a little prep time, your family can have a home-cooked meal even on a busy day…Enjoy!

International Bacon Day 2012

What!??! Bacon has it’s own holiday??? Of course it does! Every wonderful thing in the world that deserves to be celebrated has a holiday: the day we are born, weddings, historic events and people, days of religious significance…I could go on and on.  Some holidays are local or regional, like “Fair Day” in the county where I live.  Every country has special days, such as their own Independence Day.  Of course, there are the favorites of retail shops and advertisers everywhere: the “Hallmark Holidays” like Sweetest Day (as if single people needed yet another reminder of their status a mere 8 months after Valentine’s Day!).  Then there are the fun, wacky, sometimes serious, theme-based daily, weekly and monthly observances.  Among my favorites: National Gummy Bear Day (July 15), National Pickle Day (November 14), and Squirrel Appreciation Day (January 21).  I bet you are wondering about that last one!?! And, though I truly believe that bacon should be celebrated everyday, there is International Bacon Day (September 1).

So, how did I celebrate Bacon Day last weekend?? With everything bacon, of course! I started the morning filling the house with the amazing aroma of peppered bacon frying (see: http://changingseasonings.blogspot.com/2012/03/can-bacon-really-be-any-tastier-yep.html).  Later in the day, I made spicy, cheese-stuffed, bacon-wrapped grilled jalapenos to snack on.  Then, for dinner, zesty roasted cabbage drizzled with a maple-balsamic glaze and sprinkled with…you guessed it – bacon!

Grilled Stuffed Bacon-Wrapped Jalapenos

6-8 large Jalapenos
6-8 slices bacon
1 8oz pkg cream cheese
Optional: favorite cheeses (I used Colby-Jack and Bleu-Jack.  String cheese works well too!)
Small skewers

Wash the jalapenos and leave them whole.  Make a slice through one side from about a 1/4 in. below the stem to 1/4 in. from the tip.  Using a small metal vegetable peeler tip or the handle of a table spoon, scrape out the seeds and veins, being careful not to split the pepper.

Stuff the pepper with the cheese.  If using a block cheese in addition to the cream cheese, cut the cheese to size and tuck in the slit in the pepper.  Then fill the remainder of the space with the cream cheese.  Do not over-fill the pepper or you will have a mess when you cook it.  Wrap a slice of bacon around the pepper and secure with a skewer.  If you are using wooden skewers, be sure to soak them for about an hour prior to using them so they are less likely to burn.  Place the peppers on the grill (you can use a grill pan if necessary) and grill on medium-high.  Turn the peppers to evenly roast the peppers and keep the bacon from burning.  Cook until the peppers are roasted, the bacon is browned and the cheese is melted.

Roasted Cabbage with Maple Balsamic Glaze

1 head of cabbage
6 T Balsamic Vinegar (I get my favorite from a local Olive Oil and Vinegar shop: www.theolivetwist.com)
4 T Maple Syrup
Kosher or Sea Salt
Cracked Peppercorn
Olive Oil
3 slices of bacon cooked and crumbled

Wash the Cabbage and peel of any wilted outer leaves.  Slice the cabbage in rounds about 1-1 1/2 in. thick.  Lay on a baking sheet and drizzle generously with olive oil.  Sprinkle with salt and pepper.  Roast in the oven at 400 degrees for 40-45 minutes.

Mix the vinegar, maple syrup and a pinch of the salt in a small saucepan over medium heat until boiling.  Plate the roasted cabbage and drizzle with the glaze.  Top with the crumbled bacon.

Grilled Bruschetta with Fire Roasted Tomatoes and Garlic

The other day, my son asked me what my favorite food is.  He was on a mission.  He was curious about what my favorite things are: color, car, animal, not because of a deep desire to better understand the things his mom is passionate about, but to try and hack into my computer account.  I caught on quickly, and informed him he was very much off base and commended him for his effort.  However, I was not able to answer the favorite food question.  Being a person who loves to cook and to eat, I have so many foods that I adore.  I can’t pick just one thing (no, not even bacon!), though there are definitely tastes that I love such as lemon, garlic, strong herbs like rosemary and cilantro, and the spicy flavors of regional and ethnic foods like Cajun, Caribbean, Mexican and Indian.  Even though I can’t name one food that is my absolute favorite, I do have several weaknesses…foods that I just can’t say no to.  Two of my biggest weaknesses, bread and cheese.  This simple recipe includes both a crusty bread and soft cheese, as well as garlic and fresh herbs.  It is quick and easy, and is a versatile appetizer or just a tasty snack.

Bruschetta is an Italian antipasto made from toasted bread rubbed with garlic and drizzled with olive oil.  The bread can be topped with roasted peppers, tomatoes, cured meats like chorizo, salami or pepperoni and cheeses.  The popular Americanized version of Bruschetta is topped with tomatoes, garlic and basil with mozzarella cheese.

Like so many foods, this recipe is even better when prepared on the grill.  This Father’s Day weekend, I’m blogging from one of my dad’s favorite places: our family lake cottage.  Being at the lake offers a few challenges to food prep, mostly because I’m not in my own kitchen with my tools.  I even forgot to toss my favorite knife into the supply bag with the rest of my ingredients.  If you ever used a knife at our lake place, you would understand why that’s a big deal.  Most of the knives are probably antiques and can barely cut through soft butter, but I found the sharpest one and made it work.  The other catastrophe this trip was that my favorite olive oil fell over in the back of the car during the trip and leaked out of the bottle.  My husband’s reaction: “oh man, the truck carpet!”  My reaction: “oh man, my olive oil!”  Priorities, right!?!  Thankfully, I still had enough to cook with, but I will be making a trip to The Olive Twist this week to stock up!

Grilled Bruschetta with Fire Roasted Tomatoes and Garlic

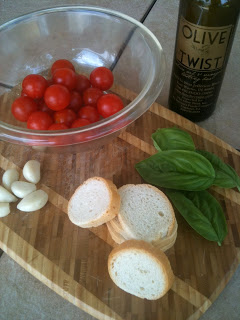
1 package Cherry or Grape Tomatoes
1 8oz pkg Fresh Mozzarella Cheese
1 loaf Crusty Italian Bread cut in 1/2 in slices (our local grocery store sells bags of “day old” bread already sliced)
1 head of Garlic (leave one clove whole to rub bread* and slice the others)
Olive Oil
Fresh Parsley (optional)
6-8 leaves Fresh Basil
Coarse ground Sea Salt and Black Pepper
Mesh grill roasting pan

*I saved myself a step and used Garlic Infused Olive Oil, so I didn’t rub the bread with the garlic.

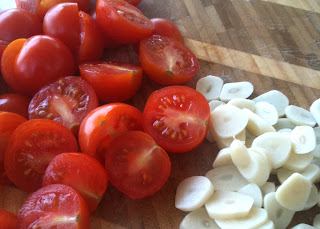
Wash tomatoes and slice in half.  Peel garlic and slice thin.
Roll the Basil leaves to make them easier to slice.
Slice Basil thin.

Place the tomatoes, garlic slices, parsley and 1/2 of the basil in a bowl.  Drizzle with olive oil.  Salt and pepper.  Toss together.  Preheat grill and grill pan.

Rub bread with garlic clove.  Drizzle olive oil on both sides.


Reduce the grill to medium-low.  Pour the tomato mixture on the grill pan.  Gently toss as the bread toasts. Lay the bread directly on the grill rack to toast.  Check frequently to be sure not to burn the toasts.  Move the pieces around the grill and flip over as necessary.

When the tomatoes start to “burst” and the garlic is lightly browned, remove from the grill and put back into the bowl.  Be cautious not to overcook the garlic as it can become bitter.  Remove the toast when a deep golden brown on both sides.

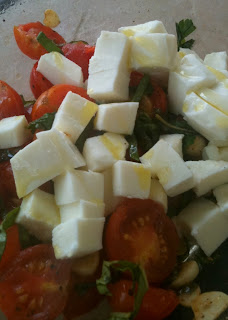
Allow the tomato mixture to cool slightly before adding cheese.  Cut the fresh Mozzarella into small pieces (about half the size of the tomatoes).  Add the cheese, the remainder of the basil and another generous drizzle of olive oil to the bowl and gently toss.  Spoon onto the toasts.  Garnish the serving plate with whole basil leaves.

When you bite into these tasty treats, the tomatoes will pop in your mouth and the juices and olive oil will run down your hands, so have napkins nearby!


Grilled Bruschetta with Fire Roasted Tomatoes and Garlic
Author: 
Recipe type: Appetizer
Cuisine: Italian
Prep time: 
Cook time: 
Total time: 
Serves: 18-20 toasts
 
Ingredients
  • 1 package Cherry or Grape Tomatoes
  • 1 8oz pkg Fresh Mozzarella Cheese
  • 1 loaf Crusty Italian Bread cut in ½ in slices (our local grocery store sells bags of "day old" bread already sliced)
  • 1 head of Garlic (leave one clove whole to rub bread* and slice the others)
  • Olive Oil
  • Fresh Parsley (optional)
  • 6-8 leaves Fresh Basil
  • Coarse ground Sea Salt and Black Pepper
  • Mesh grill roasting pan
Instructions
  1. Wash tomatoes and slice in half
  2. Peel garlic and slice thin
  3. Roll basil leaves and slice thin
  4. Place the tomatoes, garlic slices, parsley and ½ of the basil in a bowl
  5. Drizzle with olive oil. Salt and pepper. Toss together
  6. Preheat grill and grill pan
  7. Rub bread with garlic clove. Drizzle olive oil on both sides
  8. Reduce the grill to medium-low
  9. Lay the bread directly on the grill rack to toast
  10. Pour the tomato mixture on the grill pan. Gently toss as the bread toasts
  11. Check frequently to be sure not to burn the toasts
  12. Move the pieces around the grill and flip over as necessary
  13. When the tomatoes start to "burst" and the garlic is lightly browned, remove from the grill and put back into the bowl
  14. Be cautious not to overcook the garlic as it can become bitter
  15. Remove the toast when a deep golden brown on both sides
  16. Allow the tomato mixture to cool slightly before adding cheese
  17. Cut the fresh Mozzarella into small pieces (about half the size of the tomatoes)
  18. Add the cheese, the remainder of the basil and another generous drizzle of olive oil to the bowl and gently toss
  19. Spoon onto the toasts
  20. Garnish the serving plate with whole basil leaves


Butter ‘Em Up!!
“Eat butter first, and eat it last, and live til a hundred years be past.” Old Dutch Proverb
 

Warm weather has everyone wanting to avoid heating up the kitchen, grabbing the tongs and heading outside to fire up the grill!  There are many, many foods that can be prepared on the grill and often are tastier cooked over fire.  And most of those become absolute taste bud paradise when topped with butter!

Herb butter is made by combining any herb or spice with butter.  Fresh herbs, freeze dried herbs or dried herbs (spices) all work well.  My only rule (note: I didn’t say recommendation, I said rule!), is that REAL butter be used.  Whether you use salted or unsalted is your preference, but I will send a bolt of lightening to shock some sense into you if you use the fake stuff.  Okay, I realize that I don’t actually have those powers, but don’t tell my children…wink, wink!  In our house, you will find only real butter and you will find it on the counter.  To refrigerate or not to refrigerate…one of the key debates in the food world.  Not surprisingly, the USDA says to keep butter refrigerated until about 10-15 minutes before use to be safest.  However, many people will insist that butter can be kept on the counter, covered, for a week or more.  Butter is made from pasteurized milk which helps to keep bacteria growth low, as does added salt.  Typically, the butter will be eaten before it has a chance to spoil or become rancid.  To make herb butter, set the butter out long enough to soften.  You don’t want to use the microwave because you risk melting it and causing it to separate.

I made three types of herb butter to have ready for upcoming recipes: Rosemary Butter, Chive Butter and Dill Butter.

Rosemary Butter

Rosemary is a hearty herb with a pungent, woodsy flavor and like Cilantro, it is an herb that people either really like or don’t like at all. Rosemary can overpower other flavors if used too heavily.  It is a compliment to strong flavors like garlic.  It pairs well with steaks and with rich meats such as lamb, duck and game, and with vegetables such as zucchini and eggplant.  It also goes well with sharper flavored cheeses such as Bleus.  I plan to use it to top a garlic marinated steak, cooked to a warm, pink, juicy medium rare along with some crumbled Gorgonzola.

I chose to use fresh Rosemary for this recipe for two reasons: first, I have it readily available in my herb garden and second, though dried Rosemary has a similar flavor, it has a rough texture and doesn’t really soften, even in cooking.  To remove the Rosemary from the stem, simply hold the top of the stem between two fingers and using the other hand, pinch and pull down.  You can reserve the stems to use as shish kabob skewers.  In fact, skewering some fresh zucchini, mushrooms and onions, and grilling them along with the steaks would be a great side dish.

Because I wanted a very fine chop, I put the Rosemary in my spice grinder and pulsed it a few times.  Clean the grinder immediately because the potent oils can make all the spices you grind taste like Rosemary.  I have found that pouring coffee beans into the grinder and letting them sit for a day or so helps to remove spice scents from the grinder.

Mix the herbs into the butter.  I use a heaping tablespoon of herb to one stick (1/2 C) of softened butter.  The amount can vary depending upon the herb and your taste.

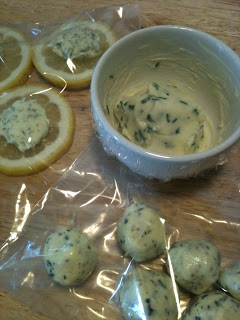
Herb butter can be stored in the refrigerator in a container or serving dish, or it can be formed into shapes for attractive presentation.  I put the Rosemary Butter in the refrigerator for a few minutes to begin to chill it, and then rolled it into balls.  I placed the balls into the freezer while I prepared the remaining butters and then transferred them to a zipping bag to store in the refrigerator until steak day.  When the steaks are ready to be plated, I will sprinkle some crumbled Gorgonzola on top and then place a ball of Rosemary Butter on it.  It’s all about the presentation, right!??!

Dill Butter

The leaves and the seeds of Dill can be used in cooking.  The seeds are used in pickling spice.  The leaves, often referred to as Dill Weed, pair well with white sauces, soft cheeses, seafood, chicken and egg dishes.  It is also tasty in salads and with vegetables.  Because it is very fine, Dill should be added at the end of cooking so that it’s flavor isn’t tempered.

The Dill Butter I made is going to be used for two purposes: to flavor steamed or grilled vegetables and to top grilled fish filets.  After mixing the Dill and butter, I placed a dollop on top of a lemon slice and store in the refrigerator or freezer until I’m ready to use it as a flavorful garnish for fish.

Chive Butter

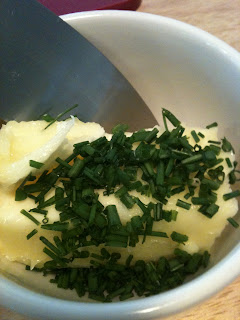
The final herb butter I made was Chive Butter.  Chives are part of the Garlic and Onion family.  Chives have a flavor similar to green onions and go well with salads, vegetables and potatoes, egg dishes and with cream cheeses.  The Chive Butter I made will be used for flavoring new (red) and fingerling potatoes, and steamed vegetables.  Sometimes, I just spread it on crackers as a snack.  Chives are easier to snip with kitchen shears than to chop.  Cut them right over the bowl of softened butter and then mix together.

I started this blog because I love to cook and have a passion for fresh herbs and spices, and because I like to share recipes and tips with others.  It is easy for me to talk about food and to create or adapt recipes.  What I have found to be the most difficult part of blogging is thinking of creative titles to capture the attention of readers.  So, I have to give credit to my 9 year old son for the title of this blog.  When I mentioned to him that I was struggling, it took all of five seconds for him to say, “how about buttering them up?” Perfect!


Kick Off Grilling Season with Beer Butt Chicken!
Why did the chicken cross the road? To perch itself comfortably upon a beer can on my grill, of course!!

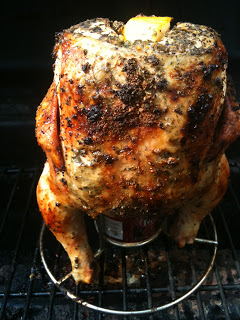
Beer Can Chicken, Beer Bum Chicken, Beer Can Roasted Chicken…whatever you call it, the end result is the same: tender, juicy, flavorful chicken! And, for those of you who might not drink or don’t particularly care for the flavor of beer, fret not! Any can of soda can be used in place of the beer, so just insert your favorite soda (a lemon-lime soda is great for this!) wherever the blog mentions beer.  If you notice, the can pictured above is actually a Dr. Pepper can, but only because we buy our beer in bottles.  After I finished the pop, I rinsed the can and then poured the beer into it.

This is the perfect recipe for making a tender roasted chicken without heating up your kitchen and with minimal attention.  It can be made on any type of grill, though having a grill with multiple burners is helpful because the chicken cooks with indirect heat.  If you only have a single burner grill, it can still be done, just place small pieces of foil around the bottom of the chicken legs to keep them from scorching.  For charcoal grills, after preheating, move the charcoal to one side of the grill for indirect heat.  A few other grill tips: remove the top rack if you have one and be sure the top of your grill is deep enough to close over the chicken standing on end; preheat the entire grill, then turn the heat off on one side or the middle if there are three burners; and, it isn’t necessary to have a fancy gadget for holding the chicken because the can and two legs will serve as a tri-pod.

As with any meat dish, the spices you can chose for flavor are endless.  And, as with most of my recipes, my choice is influenced by cravings and which herbs and spices I have on hand.  I had a large bag of lemons in the fridge, so I went with Thyme as the basis for the rub.  Thyme can have a slightly lemony flavor, and while it is potent and slow to release its flavor, it will not over-power and blends well with other spices.

Lemon-Thyme Chicken Rub:
Equal parts each – Thyme, Parsley, Coarse Ground Pepper, Garlic Salt, Celery Salt and Chives

Sprinkle about a tablespoon of the rub into the can 1/2 – 3/4 full of beer.  I also squeezed some lemon juice in the beer spice mixture.

Set the beer can on a baking sheet (in a holder if you have one).  Place the chicken over the can (trying to find the words to nicely say stick the beer can up the chicken’s bum).

To make a dry paste-like consistency, squeeze the juice of half a lemon and add about a teaspoon of minced fresh garlic to the rub.  Reserve the other half of the lemon to put in the “head hole” at the top of the chicken to help contain the steam and juices, and add additional flavor to the chicken.  A potato or an onion can also be used for this purpose.

Rub the spice mixture all over the chicken.  Be sure to rub between the skin and the meat.  Don’t forget to cover every part (even in it’s little arm pits…or I suppose it would be wing pits!?!).  Cut a small slit just above the thigh and inset the tip of the wing (like the chicken has its “hands” in its pockets) to keep the tips of the wings from scorching. Wrap small pieces of foil around the bottom of the legs, like little shoes, to keep them from scorching.

Place the chicken on the grill over indirect heat.  For a 3-4lb chicken, cook approximately 80 minutes or until the juices run clear and the internal temperature is at least 165 degrees.  Because I have a three-burner grill, I rotate the bird about every 20 minutes to ensure even browning.

Let the chicken stand for 5 minutes before cutting to allow the juices to redistribute.  The meat will be so tender that you will be able to just pull the chicken apart.  Even the breasts, which tend to be dry, will be moist and juicy.

Even though the skin is not the healthiest part of the chicken, it will be impossible to resist!  When my children say, “eeeew! I don’t want that part!” I get so disappointed…wink, wink!  We paired the chicken with some fresh green beans, steamed until tender crisp and then sautéed in a little olive oil, real butter, minced fresh garlic and a squeeze of lemon juice to tie the flavors together.  Corn on the cob goes great as well.  Enjoy this start to the grilling season!

Another summer favorite is a great use for any leftover chicken! The last time I grilled one of these tasty birds, I was the only one eating it.  And that meant, tons of leftovers.  So, I used the meat in a creamy, crunchy, sweet and savory chicken salad…Mmmm! I cleaned the remaining meat off of the bone and cut it into chunks.  I added light mayonnaise, thinly sliced celery, red grapes, green onion, honey roasted almond slices and a little salt, fresh ground peppercorns and dill weed.  For an added flavor, I tossed in some dried blueberries. Dried cranberries or cherries would be good too.

Mother’s Day = Time for Planting!

It’s always been the general rule of thumb, at least with my family here in the mid-west, that nothing gets put in the ground until after Mother’s Day.  Still some cool nights, but beautiful warm days and no worry about frosts.  I would love to have a huge yard with space for an amazing garden.  However, my house, a lovely old home that has been in my family since the early 1900’s, has the tiniest yard.  Great if you don’t like to mow, but not so wonderful for gardening.  So, I make do with a container garden.  I have a tomato plant, some jalapeños and my herb garden, of course.  The invention of the hanging garden bags has provided the option of a few more plants as well.

This weekend was an amazing weather weekend, perfect for yard work and planting! I went to a local market and greenhouse on Saturday to purchase hanging baskets, flowers to plant and the herb and vegetable starts.  I have tried a couple of times to start my herbs from seed, but I wasn’t very successful.  So, what herbs do I plant??

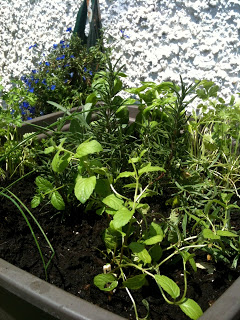
I plant all my favorites, especially those that I need for salsa and other summer grilling recipes.  My herb garden this year includes: Rosemary, Cilantro, Chives, Mint, Thyme, Tarragon, Sage, Parsley and Basil.  Given plenty of sun, moist soil and pruned occasionally (which is easy since I will cook with the fresh herbs on nearly a daily basis), the plants will provide herbs all summer.  If you have a place inside your home that is conducive to good growing, you can move the herbs indoors when the weather gets cold.  Herbs can also be frozen to be used in cooking whenever the recipe calls for fresh herbs.

I recently made quick and easy chicken and steak fajitas using the Cilantro I had leftover from making salsa, and didn’t get that posted (yet) but watch for more recipes using fresh herbs to come!  Because of their wonderful fragrances, herbs can be used for other purposes too.  A new favorite room freshener of mine combines a lemon cut in half, a few sprigs of fresh Rosemary and a couple tablespoons of vanilla.  Place in a small saucepan half filled with water.  Put on the stove and simmer to fill your home with a fresh scent.  I actually put a small bowl in one of our vehicles overnight to help remove “wet dog” smell…it worked great!

Some like it HOT! Mmmm…Salsa fresca!!

Just in time for Cinco de Mayo, comes another of my favorite herbs: Cilantro! And, how better than to incorporate this fresh and flavorful herb in a recipe than Salsa!?!

The one thing I have found is that people either love cilantro or they really don’t like it…there aren’t too many in between.  It has a very distinct flavor that leaves no question about whether it can be found in the recipe.  Even if you love it, be cautious because you can use too much of it.  Cilantro is the leaf of the plant and coriander is the seed.  Even though they come from the same plant, their tastes are very different and they can not be used to replace each other in recipes.  Cilantro is wonderful fresh, but can also be found in dried spice form.  The best way to store fresh cilantro is to make a new snip on the stems and place the bunch in a cup of water like you would a flower bouquet.  Depending upon how quickly you will use it, you can store it on a counter or in the refrigerator.  Wash and gently pat dry just before using.  The leaves and stem can be used. Cilantro is often found in  Mexican and Latin American recipes, but is also found in Middle Eastern, Mediterranean, Indian, South Asian, Chinese, African and Southeast Asian cuisine.

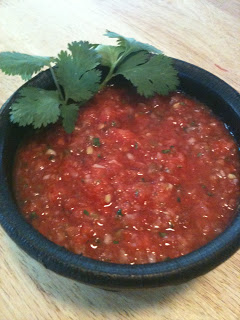
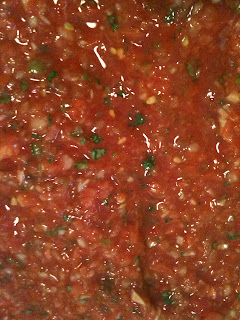
Technically, my salsa is a pico de gallo.  What’s the difference, you ask?? The difference between salsa and pico de gallo is whether it is cooked or fresh.  Salsa is made with cooked ingredients and pico is made by chopping and mixing fresh ingredients.  However, the term “salsa” is pretty much used to describe any sauce, red or green, sweet or spicy, chunky or smooth, that is made from the basic base of tomatoes, onions, garlic, peppers and vinegar.  The best part about this sauce is you can make it any way you like it.  There are so many variations and things that can be added: corn, black beans, fruits (mango, pineapple and raspberries are some of my favorite!), and peppers (jalapeno, habanero, and chipotle [roasted peppers]). The other aspect you control is the amount of heat.  Depending upon which peppers you use, how many of those peppers and whether you leave the seeds and veins intact.  TIP: to easily remove the seeds and veins from the peppers, use a grapefruit spoon.

I suppose I really shouldn’t refer to this as a recipe for salsa, but really more as a framework.  There are so many variables that influence the exact amount of each ingredient, that really the best thing you can do is add some of each thing, sample and adjust according to your taste.  You never know how ripe and flavorful the tomatoes will be so you may need to add tomato paste to spark up the flavor a bit.  I always dig to the bottom of the bin at the grocer’s and chose tomatoes that are almost over-ripe.  Roma tomatoes are my favorite for cooking because they are more “meaty.”  Peppers can vary in heat, so always start with a little then add more if needed…you can’t take the heat back out easily.  Also, the longer the salsa sits, the hotter it will become.  Salt and sugar work together, so add a bit of both at the same time.  And, again, cilantro has a very strong flavor so add sparingly.  For the acid, I typically just use white vinegar, but sometimes add a little fresh lemon or lime juice for a different flavor.

Salsa Fresca

8-10 really ripe Roma tomatoes
2-3 jalapeños depending upon size and heat
1/2-1 habenaro (optional…if you like it HOT)
1 large Texas sweet or Vidalia sweet onion
4-5 cloves of garlic (about 4t minced if you use jarred instead of fresh…either works)
a handful cilantro (more or less depending on how much you like that flavor)
1 small can tomato paste (use 1/2-whole can depending on ripeness of tomatoes and for thickening)
1/4 C white vinegar
1/4-1/2 C sugar
1-2 T kosher or sea salt

You can prepare this salsa by hand chopping all the ingredients, and if you like yours more chunky, that is probably what you would want to do.  It can also be made using a food processor or even a blender.  I prefer mine to be less chunky and thick, so I use my food processor.  I have an awesome processor that does large pieces of food in large amounts, so I only have to peel and rough chop the ingredients and toss them in.  I can also make a decent sized batch in one processor bowl.  However, because of the massive amounts of salsa that are eaten by my family, friends and co-workers, I make multiple bowls and mix them together in one very large bowl before pouring into various containers for distributing and storing.  This salsa lasts for quite awhile in the refrigerator.  I would like to be able to tell you exactly how long, but it rarely lasts more than a week in my house before being devoured!

Some like it HOT! Mmmm...Salsa fresca!!
Author: 
Recipe type: Appetizer, Condiment
Cuisine: Mexican
Prep time: 
Total time: 
Serves: 4 Cups
 
Fresh Pico de Gallo. Use as a topping for your favorite Mexican dishes or serve with chips.
Ingredients
  • 8-10 really ripe Roma tomatoes
  • 2-3 jalapeños depending upon size and heat
  • ½-1 habenaro (optional...if you like it HOT)
  • 1 large Texas sweet or Vidalia sweet onion
  • 4-5 cloves of garlic (about 4t minced if you use jarred instead of fresh...either works)
  • a handful cilantro (more or less depending on how much you like that flavor)
  • 1 small can tomato paste (use ½-whole can depending on ripeness of tomatoes and for thickening)
  • ¼ C white vinegar
  • ¼-1/2 C sugar
  • 1-2 T kosher or sea salt
Instructions
  1. Place ingredients in a food processor or blender (hand chop if preferred)
  2. Blend to desired consistency


Grilled Ribeye with a Whiskey Marinade

One way to add flavor to meat is to use a marinade.  A marinade is made by combining an oil, an acid and spices.  Historically, people used marinades to both tenderize and flavor meat.  More recently, however, it has been discovered that marinades don’t really have an effect on how tender the meat is.  The cut and quality of the meat and how it is cooked determines how tender it will be.  In fact, if certain meats are left in a marinade too long the tissue will break down and the meat will be grainy.  Even after soaking several hours, marinades only soak into the outer layers of the meat, not clear through, so it is important that you use a high quality piece of meat to really get the best flavor.  Remember that, for steaks, the more marbled with fat the piece is, the more natural flavors you will have.

Now, here’s where the fun starts.  You can use any combination of your favorite oil, acid and spices to make your marinade.  I prefer a high quality olive oil, and am able to purchase them at a local gourmet olive oil and vinegar shop, The Olive Twist.  The acid can be a vinegar, wine, liquor or citrus juices.  Some of my favorites are balsamic vinegar, a Chardonnay or Cabernet Sauvignon, whiskey, tequila or lemon/lime juice.  Which I use, depends on the type of meat and the flavor I’m trying to achieve.  For example, for jerk chicken, I would use olive oil, lime juice, rum or tequila and Caribbean style spices such as all spice, cinnamon, cloves, garlic, nutmeg, habanero chiles, and thyme.  More often than not, my marinades are a combination of what I have on hand.

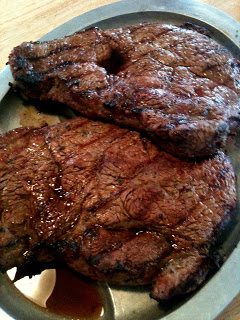
A warm day last weekend, contributed to a craving for steaks on the grill (which my former husband would eat six days a week, with Mexican food on the seventh day, if meal planning was up to him!).  So, a quick trip to the grocery store for beautifully marbled ribeye steaks cut an inch thick, and some potatoes and salad ingredients, and we were ready to cook! I chose a whiskey marinade because we had some tasty Jameson Irish Whiskey on hand.  I decided to keep it simple, but because of the strong flavor of whiskey, chose to use garlic and pepper to compliment it.

Whiskey Marinade:
(amount of each ingredient would vary depending on the quantity of meat, this was for two 16oz steaks)
1/2 C your favorite Whiskey
1/4 C Olive Oil
1 T minced fresh garlic
1 T course ground black or rainbow peppercorns
1 T dried parsley

Mix all of the ingredients in a large zip close bag.  Add the steaks turn and massage so that the marinade covers the meat.  Refrigerate for 2-4 hours, turning bag occasionally.

To get a flavorful char on the meat, make a dry rub using the same spices you used in the marinade and apply to the steak before grilling.  Grill to your preference.  For me, that means a quick 5-6 minutes per side on a medium-high grill for a medium rare steak.  Sooo tasty!!

Grilled Ribeye with a Whiskey Marinade
Author: 
Recipe type: Main Dish
Cuisine: American
Prep time: 
Cook time: 
Total time: 
Serves: Serves 2-4
 
A basic marinade made with whiskey, perfect for steak!
Ingredients
  • ½ C your favorite Whiskey
  • ¼ C Olive Oil
  • 1 T minced fresh garlic
  • 1 T course ground black or rainbow peppercorns
  • 1 T dried parsley
Instructions
  1. Mix ingredients in a large sealable bag
  2. Add meat
  3. Massage to cover the meat
  4. Place in the refrigerator for 2-4 hours
  5. Turn meat occasionally